Hazelnut Cream Beignets
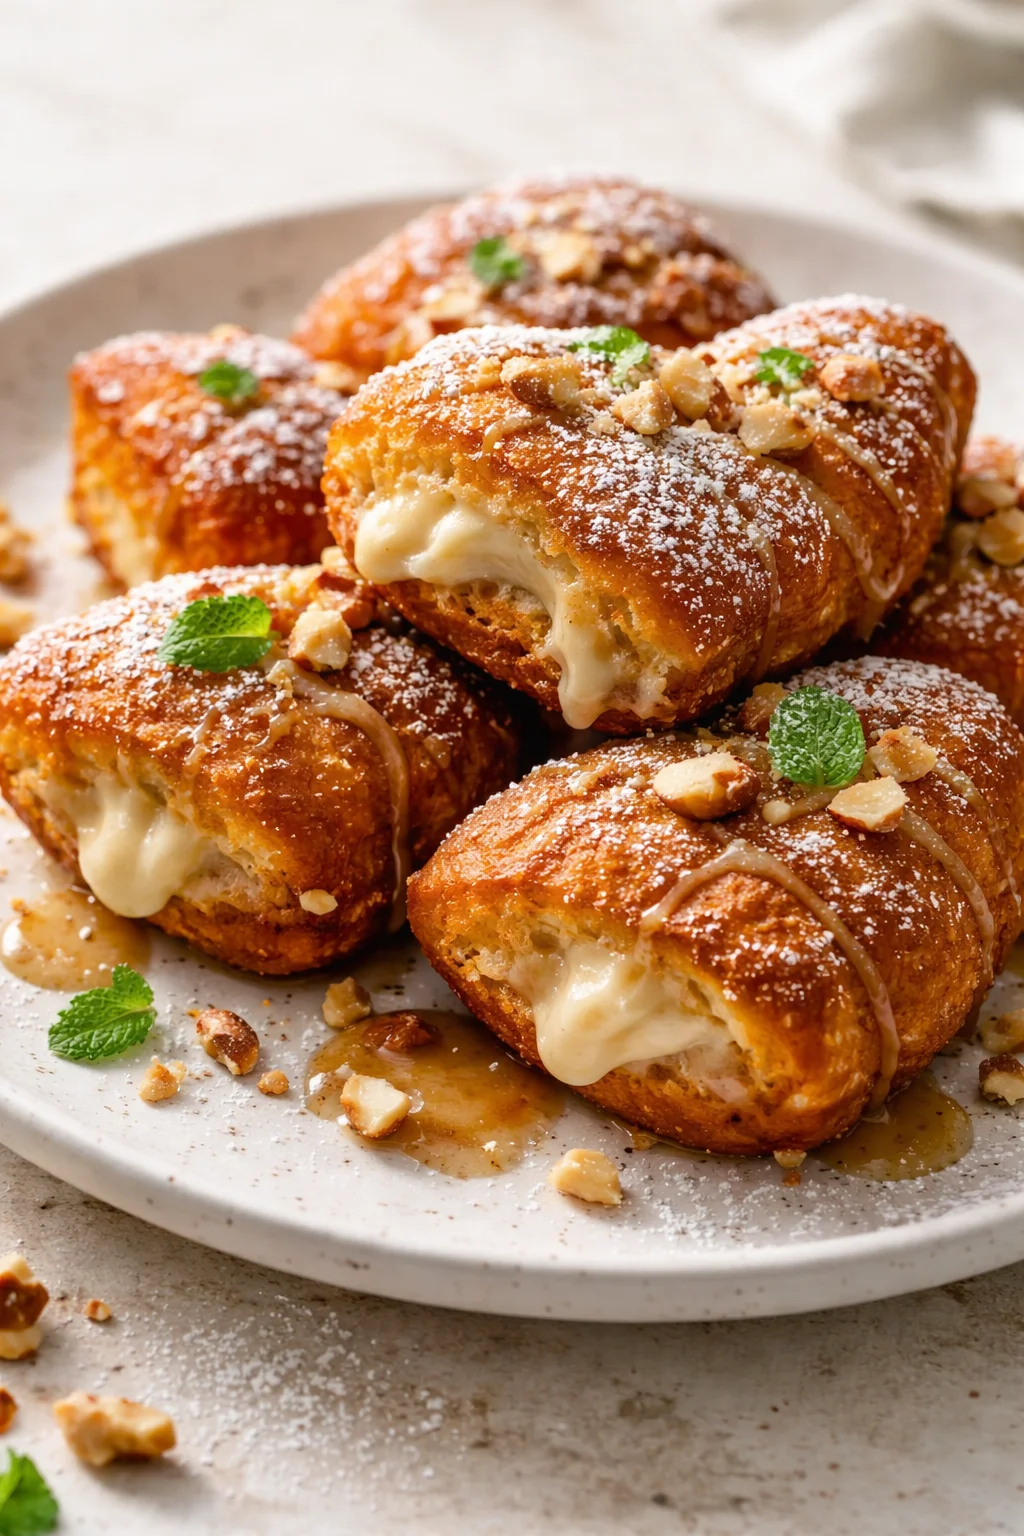
These hazelnut cream beignets bring together airy, fluffy fried dough and a smooth chocolate-hazelnut custard that’s pure comfort on a plate. I’ll guide you through making that rich, enriched yeast dough, frying the beignets until they’re perfectly golden, and whipping up that silky hazelnut cream to pipe inside. You’ll get a slightly crispy outside, a light and airy interior, and a luscious filling—perfect for brunch, dessert, or whenever you need a special treat.
These hazelnut cream beignets are a sweet indulgence that doesn’t feel out of reach: soft, enriched yeast dough fried just right and filled with a creamy chocolate‑hazelnut custard. You’ll enjoy a delicate crisp on the outside with a fluffy inside and a rich, velvety center that’s just irresistible. They’re wonderful for brunch, a dessert to impress, or any time you want to treat the family.
This recipe takes you through every step—from mixing the enriched dough, giving it time to rise, frying up light and golden beignets, to making a smooth hazelnut chocolate custard and piping that filling inside. It’s great for home bakers of all levels and uses everyday ingredients you likely have on hand. You’ll end up with about 10 filled beignets that everyone will love.
Keep scrolling for a full list of everything you need, simple step-by-step directions, super helpful tips for getting the perfect texture and frying results, plus fun variations and storage advice so you can make these your own cozy creation.
Why You’ll Love Them
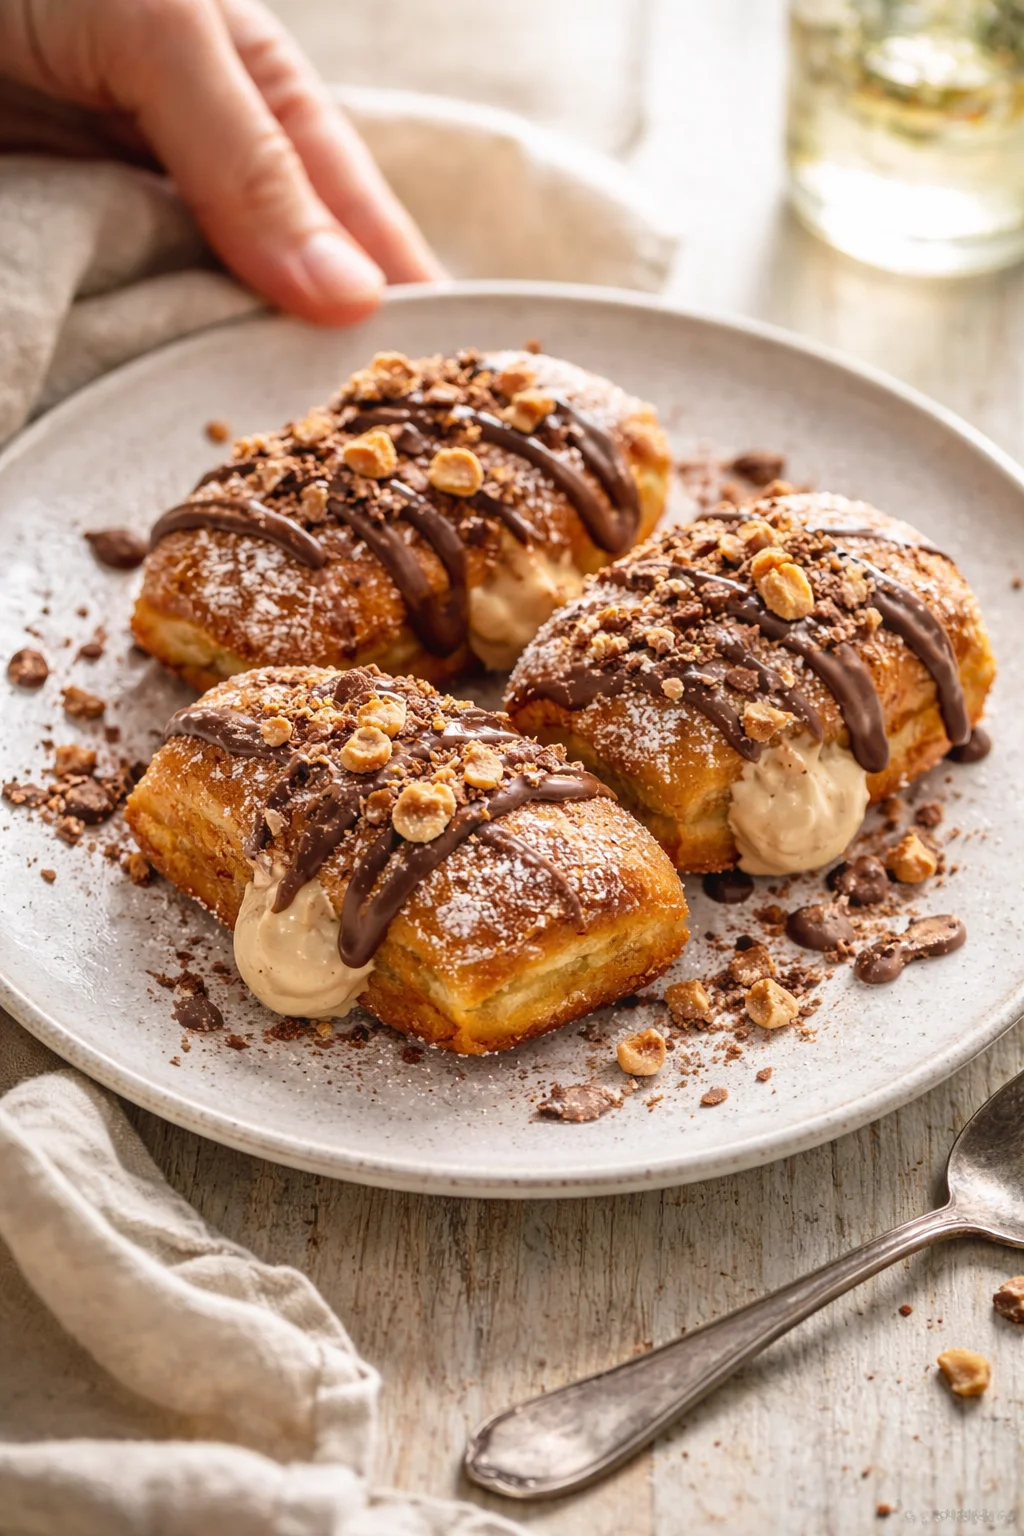
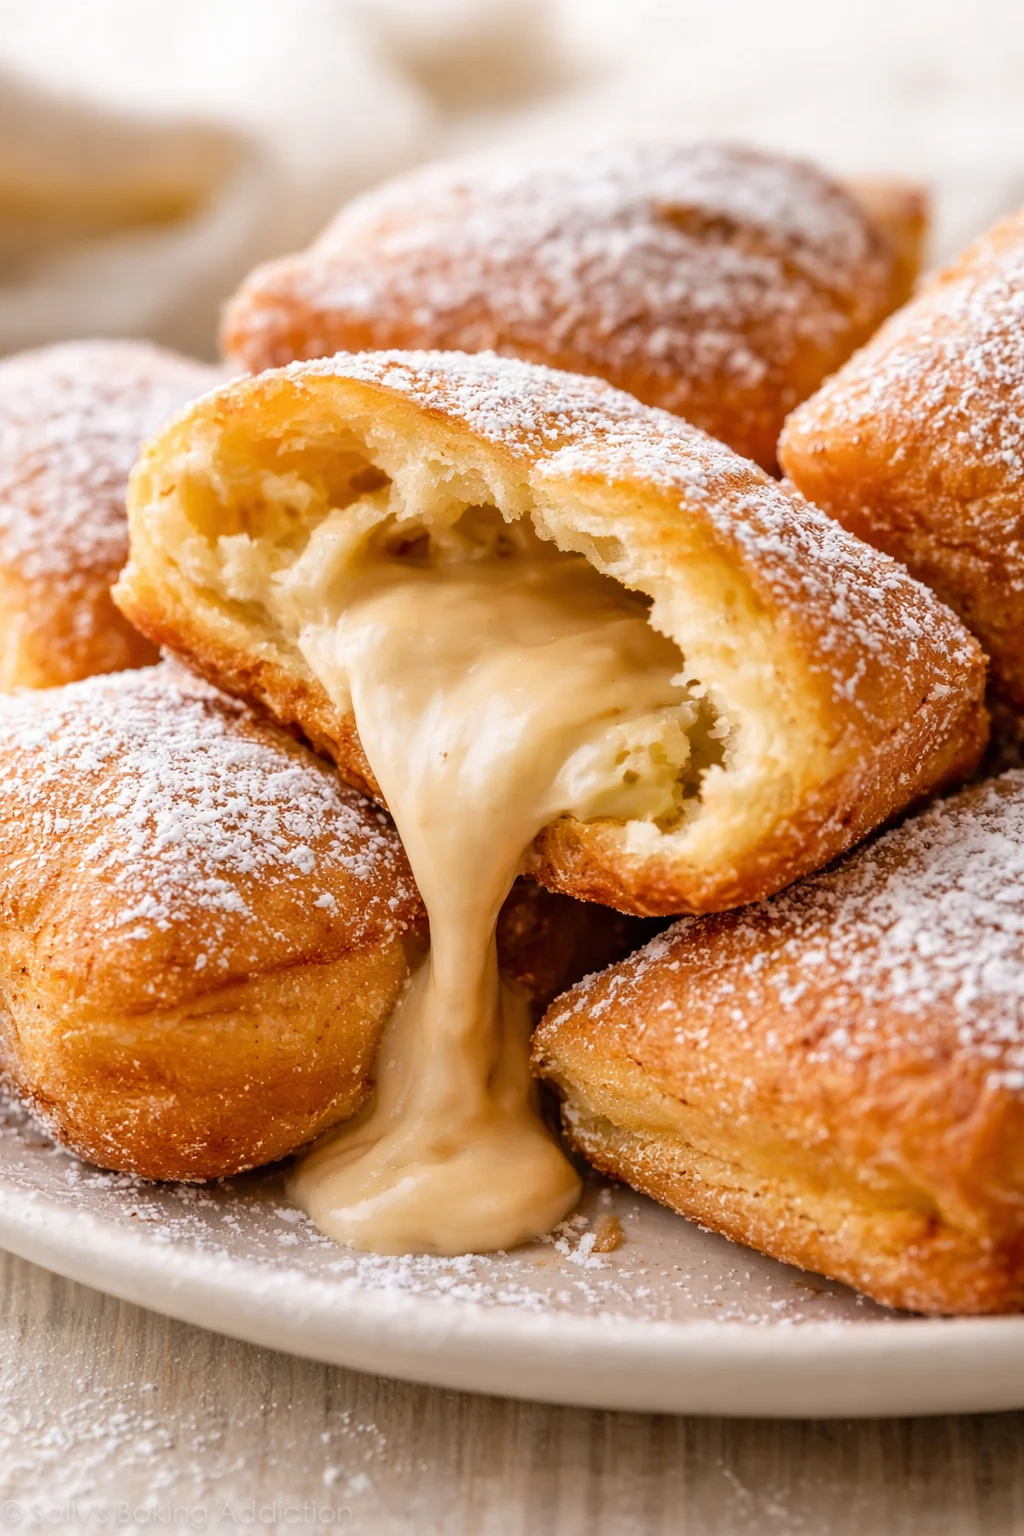
These beignets are all about delightful contrasts. The light, airy dough pairs beautifully with a rich and silky hazelnut-chocolate filling that’s seriously indulgent. The dough itself is forgiving—you just mix, knead a bit, and let it rise a couple of times. The custard filling is smooth and easy to make right on the stovetop. Best of all, you can keep things classic by dusting them with powdered sugar or amp up the decadence by drizzling with melted chocolate and sprinkling chopped hazelnuts on top.
Ingredients You’ll Need
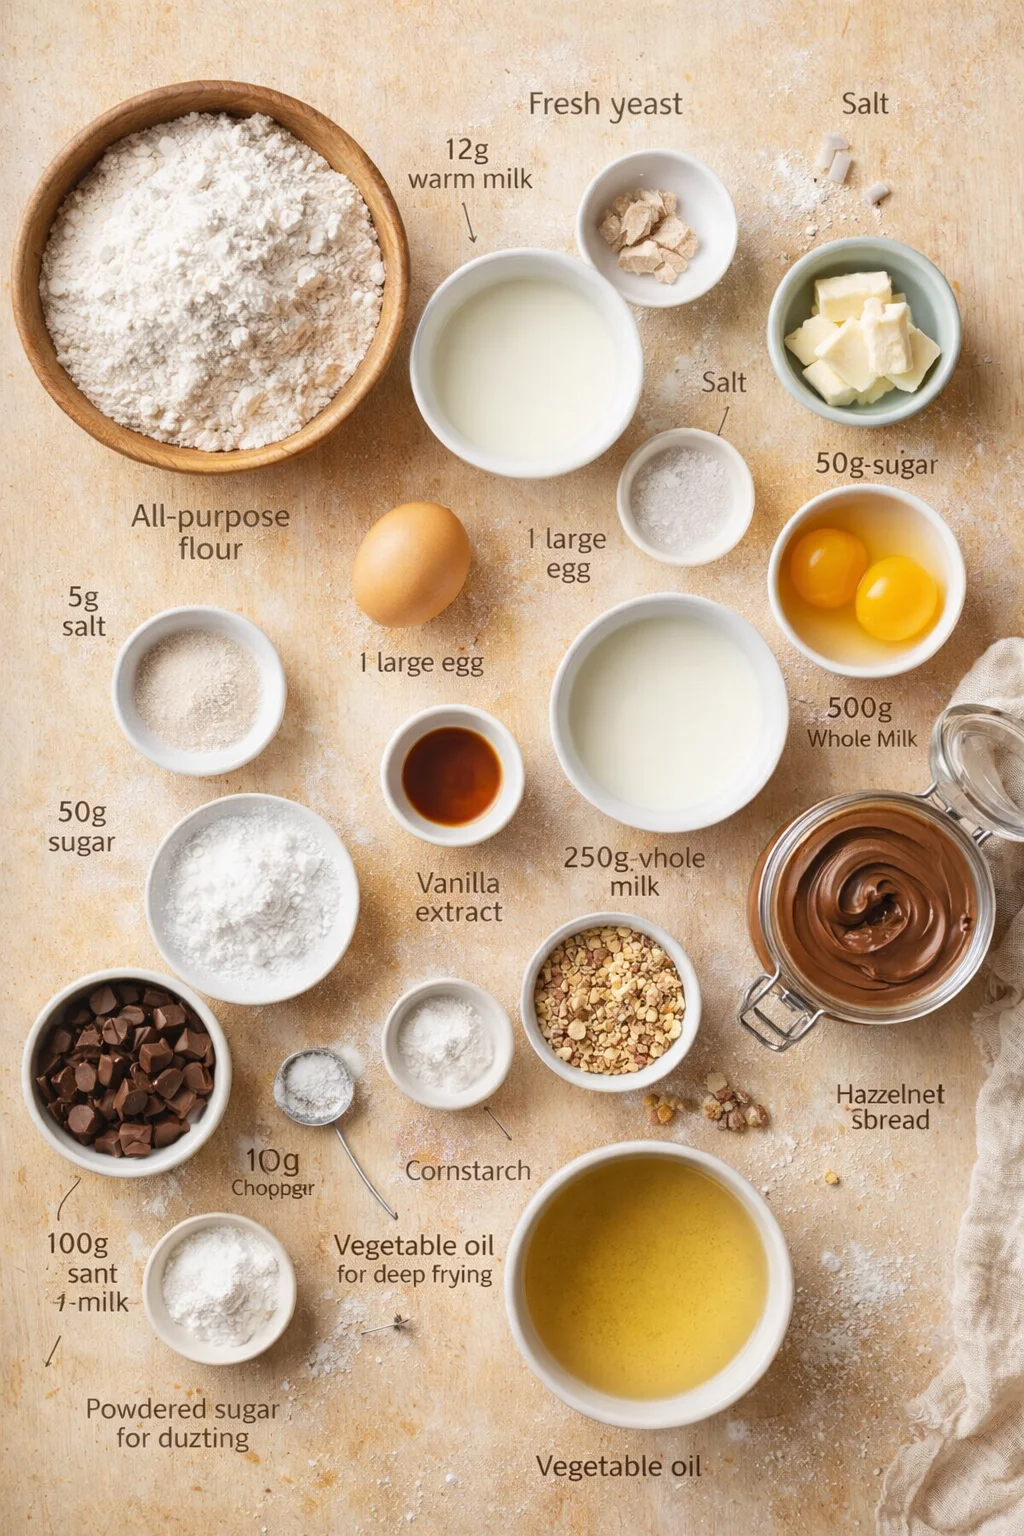
- 250g all-purpose flour
- 100g warm milk
- 12g fresh yeast (or an equivalent amount of active dry yeast)
- 5g salt
- 1 large egg
- 25g sugar
- 50g butter, softened
- 250g whole milk
- 40g egg yolks (about 2 yolks)
- 15g cornstarch
- 100g chocolate (choose dark or milk, whatever you prefer)
- 150g hazelnut spread
- 1 tsp vanilla extract (optional, adds a nice touch in the custard)
- Vegetable oil for deep frying (enough to fill your pot or fryer)
- Powdered sugar for dusting
- Extra melted chocolate and chopped hazelnuts, optional for drizzling and garnishing
Dough, Frying, and Filling
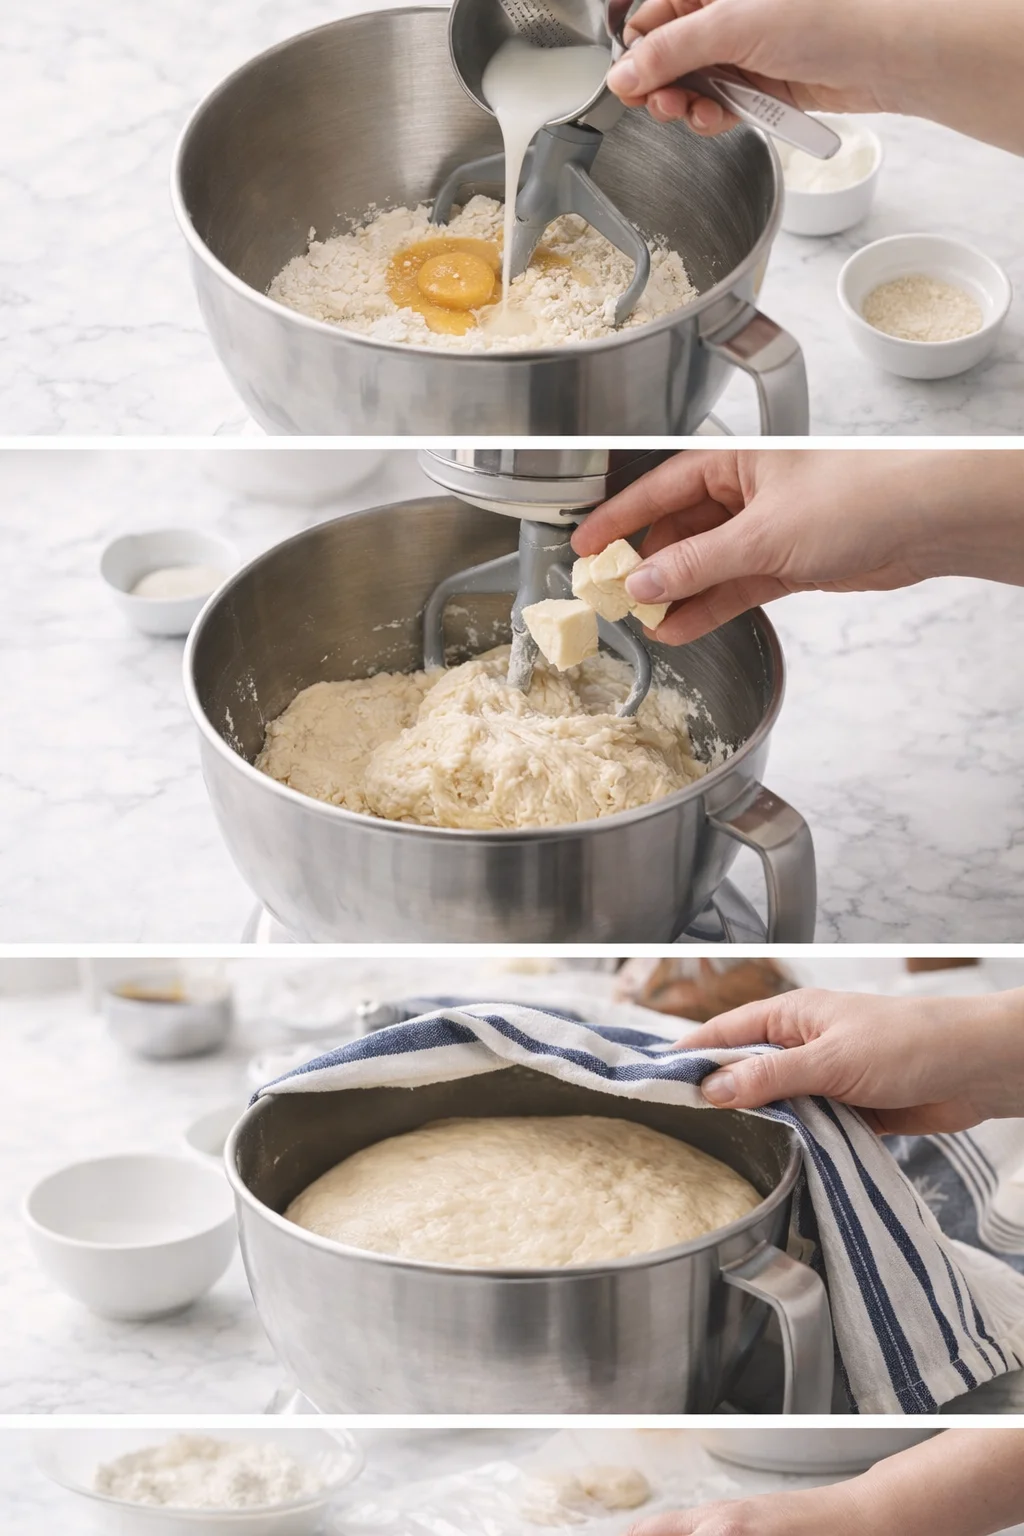
- Combine flour, warm milk, yeast, salt, egg, and sugar in the bowl of a stand mixer and mix on medium speed until a rough dough forms (about 4–5 minutes).
- Add softened butter and continue kneading on medium until the dough is smooth and elastic (about 5–7 minutes).
- Cover the bowl with a kitchen towel and let the dough rise in a warm spot until doubled in size, about 1–2 hours.
-
Punch the dough down, divide it into 10 equal pieces, shape each into a round ball, place on a floured surface, cover, and let rise until puffy, 30–45 minutes.
- Heat vegetable oil in a deep pot or fryer to 170–180°C (340–350°F), keeping the oil temperature steady and working in small batches.
- Carefully lower the dough balls into the hot oil and fry, turning once, about 2–3 minutes per side, until golden brown and cooked through; remove with a slotted spoon and drain on paper towels.
- Whisk together milk, egg yolks, cornstarch, and vanilla in a medium saucepan; heat over medium, stirring constantly until the mixture thickens and just starts to bubble.
-
Remove the custard from heat, stir in the chocolate until melted and smooth, fold in the hazelnut spread, press cling film directly onto the surface, and chill until completely cool.
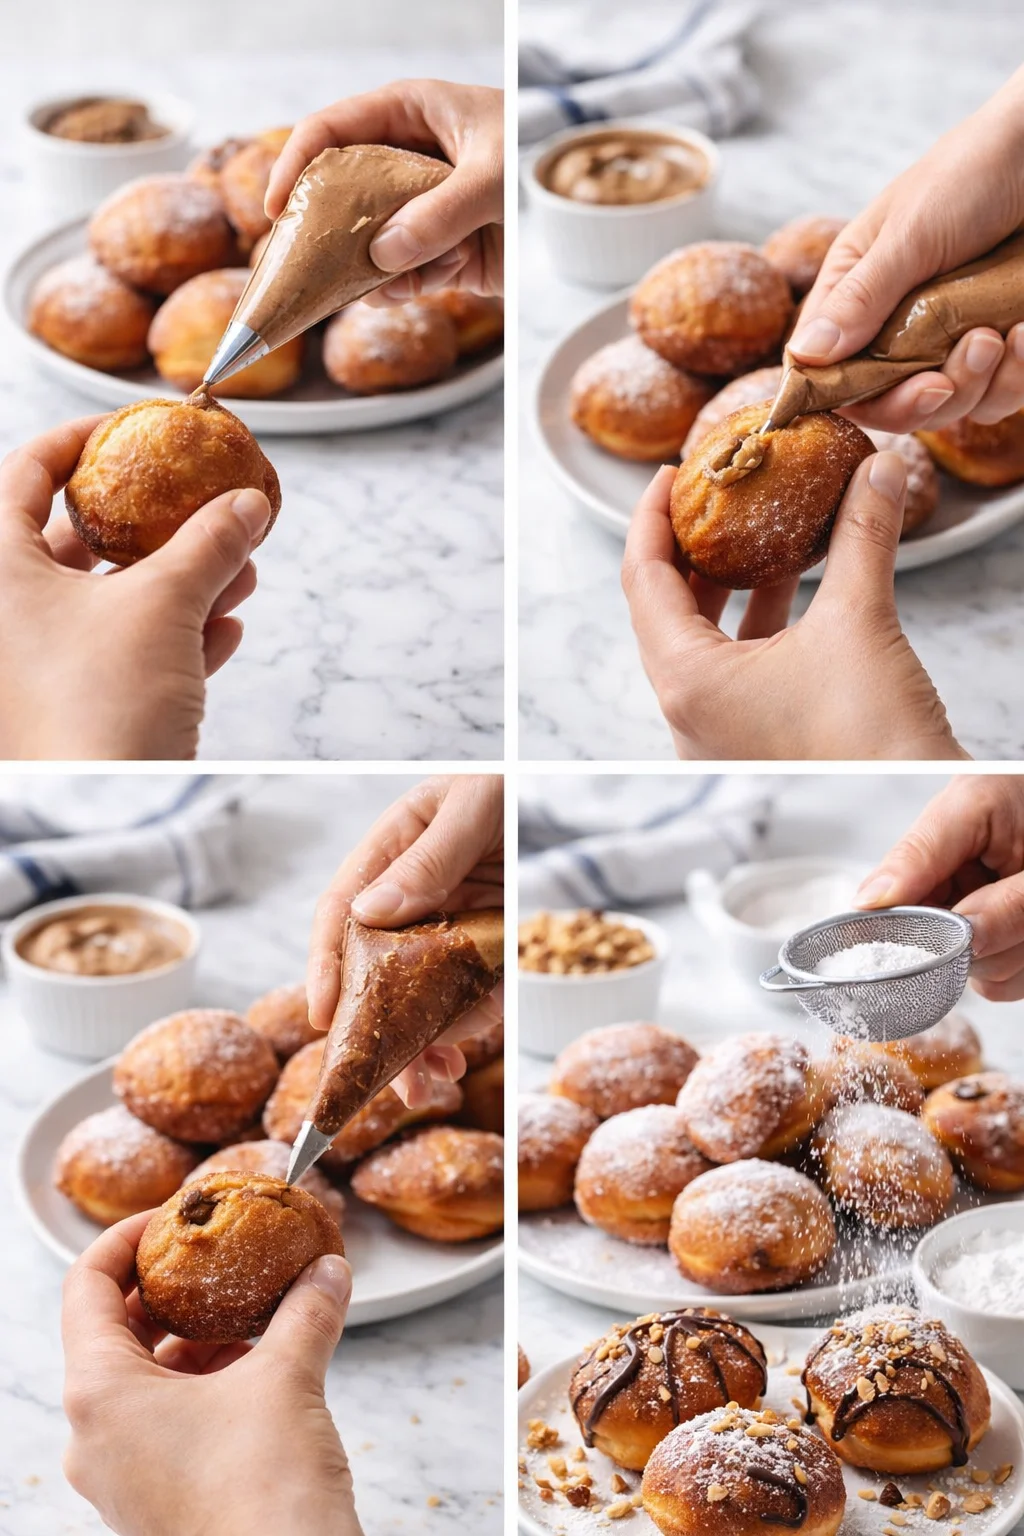
- Fit a piping bag with a small tip and fill it with the cooled hazelnut cream; gently insert the tip into the side of each cooled beignet and pipe filling until slightly weighty but not overstuffed.
- If you don’t have a piping bag, cut a small pocket with a sharp knife or use a disposable plastic bag filled with cream and snip a tiny corner to pipe.
-
Dust filled beignets with powdered sugar or drizzle with melted chocolate and sprinkle with chopped hazelnuts as desired.
Pro Tips for Perfect Beignets
- Keep your oil at the right temperature—between 170 and 180°C (340–350°F) is perfect. Too hot means the outsides brown too fast but the centers stay raw; too cool and your beignets soak up way too much oil.
- Make sure the hazelnut cream is fully cooled before filling. Warm filling can make the dough soggy and gets tricky when piping.
- Don’t overcrowd the fryer. Working in small batches helps your oil temperature stay steady and ensures a nice, crisp golden crust.
- Press cling film right onto the surface of your custard while it’s cooling. This keeps a skin from forming and keeps your cream silky smooth.
- If you don’t have a piping bag, you can still fill these beauties! Use a small spoon along with a sharp knife to cut a little pocket in the beignet, or take a disposable plastic bag, fill it with cream, and snip off a tiny corner to make a DIY piping bag.
Flavor Swaps and Add-Ins
- Switch up the hazelnut spread for almond butter or peanut butter blended with a little melted chocolate for a new nutty twist.
- If you want a pure chocolate filling, skip the hazelnut spread and just use melted chocolate—choose dark, milk, or even white chocolate depending on your mood.
- For a grown-up upgrade, stir in a tablespoon of coffee or hazelnut liqueur into the custard for an extra layer of flavor.
- Want a lighter version? Bake the dough balls at 200°C (400°F) for about 10 to 12 minutes instead of frying. They won’t have the crispy fried crust but will be tender and tasty.
Storing, Freezing, and Reheating
These beignets are best enjoyed fresh the day you make them. If you need to store leftovers, keep the filled beignets in an airtight container in the fridge for up to 2 days. To keep texture at its best, store the hazelnut cream separately in the fridge for up to 3 days and fill the beignets just before serving. You can also freeze the unfilled, shaped dough balls (after their first rise) for up to a month. When you’re ready, thaw them, let them rise again, then fry as usual. To reheat filled beignets, pop them in a 160°C (320°F) oven or an air fryer for a few minutes to refresh the outside. Avoid microwaving since that tends to make them soggy.
Common Questions
Can I use active dry yeast instead of fresh yeast?
Absolutely! Use about one-third the weight of fresh yeast—around 4g of active dry yeast. Just bloom it in the warm milk for 5 to 10 minutes before mixing it into your dough.
How do I know the dough has risen enough?
Look for the dough to roughly double in size. When you press a finger gently into it, the indentation should slowly bounce back.
Can I make the filling ahead?
Definitely. Make the hazelnut cream a day in advance and store it in the fridge, covered with cling film pressed directly on the surface. Before filling, bring it to room temperature and give it a quick whisk.
Is there a way to fill beignets without a piping bag?
Yes! Use a small sharp knife to cut a pocket and spoon in the filling, or grab a disposable plastic bag, fill with cream, and snip a tiny corner off to use like a piping bag.
Can I bake these instead of frying?
You sure can! Bake them at about 200°C (400°F) for 10 to 12 minutes until golden. While they won’t have the crispy fried crust, they’ll still be soft, tasty, and easy.

More in Breakfast

Rhubarb Dream Bars
Green Onion Zucchini Cheddar Quick Bread

Sweet Cinnamon Sugar Bread