Easy Keto Zucchini Chips

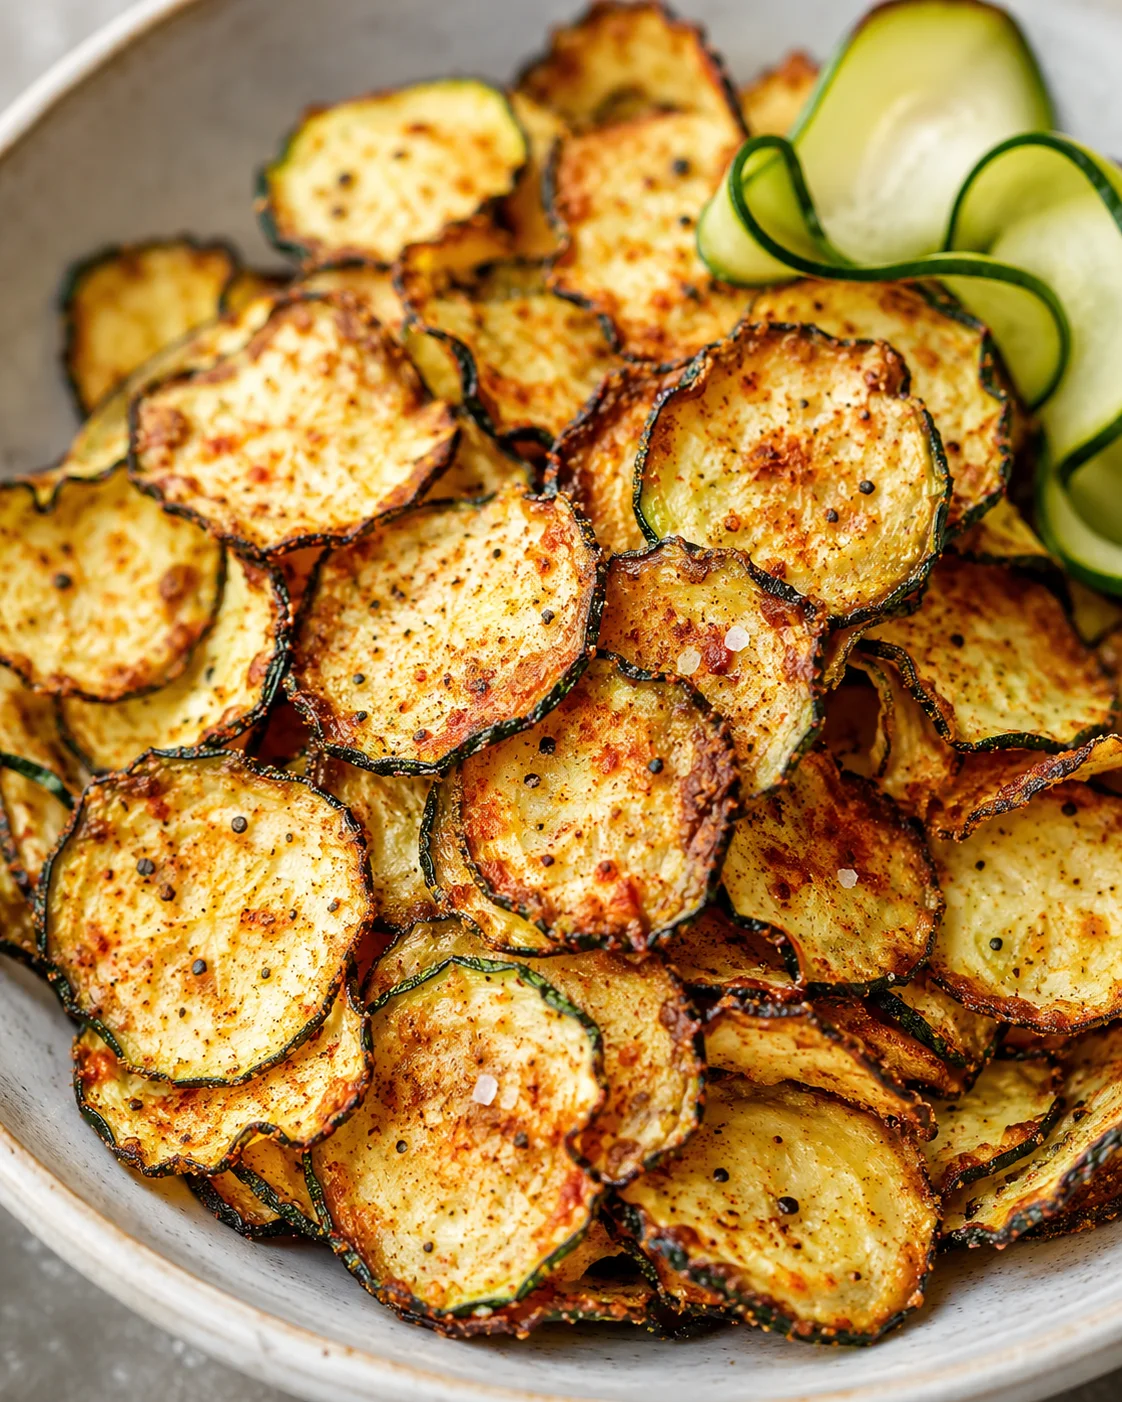
Crunchy keto zucchini chips make a fantastic, healthy snack when you’re looking for something crispy without the carbs. I’m excited to share easy ways to make these zucchini chips in the oven, air fryer, or dehydrator. Once you try them, they’ll quickly become one of your favorite go-to keto snacks!
Craving a crunchy, salty snack that won’t mess with your keto goals? You’ve got to try these zucchini chips!
They’re irresistibly tasty, especially with a sprinkle of smoked paprika that gives them a flavor very similar to the iconic Canadian ketchup potato chips. But honestly, you can season these keto zucchini chips however you like — the flavor possibilities are endless.
Zucchini is such a handy, low-carb veggie that keeps showing up in my kitchen in new ways. It makes keto zucchini bread moist, doubles as a pasta stand-in for lasagna, and now shines as a super-thin crispy chip. Who can resist that crunch? Not me!
I’ve been making these keto zucchini chips since 2012 and have tested lots of ways to get them perfectly crispy. You’ve got three great cooking options for these chips:
- Baked in the oven
- Made in a dehydrator
- Quick air fryer version
Each has its perks and downsides. I like oven-baking best because I can do a big batch at once and keep an eye on them as they crisp up. The air fryer is way faster, but you’re limited to a single layer, so fewer chips at a time. And a dehydrator works fantastic, but it takes quite a few hours — around 8 to 10 — and not everyone owns one. No matter which way you go, they’re all delicious!
If you’re hunting for a salty, crunchy snack that fits perfectly into your keto lifestyle, these keto zucchini chips are exactly what you need. They’re an easy, low-carb alternative to traditional potato chips that you can whip up at home. In this post, I’ll guide you through turning one large zucchini into satisfyingly crisp chips using three different methods: oven baking, air frying, or dehydrating. Plus, I’ll share key prep tips that really boost the crisp factor.
Stick around for a simple ingredients list, step-by-step instructions, and timing details so you can pick the method that matches your day. You’ll get the scoop on slicing (hint: mandolin or slicing disk are lifesavers), the salt-and-drain step that changes everything, how long each method takes (oven: about 70–90 minutes; air fryer: roughly 10 minutes for a single layer; dehydrator: 8–12 hours), plus seasoning ideas and storage tips. I’ll also sprinkle in troubleshooting advice, seasoning swaps, and reheating hacks so your chips stay crispy and delicious.
- Tools and timing: grab a mandolin or food processor, parchment paper, and your choice of oven, air fryer, or dehydrator with practical time estimates.
- Key technique: light salting, thorough pat-drying, and just a touch of oil make all the difference for crispy results.
- Flavor and storage: easy seasoning ideas like smoked paprika, garlic, or onion powder and simple ways to re-crisp chips if they soften over time.
Why You’ll Love These
These keto zucchini chips give you that satisfying crunch and saltiness without the carbs or guilt. They’re quick to prepare and require only a few basic ingredients. Plus, you can easily customize the seasoning to match your cravings — smoked paprika turns them into ketchup-style chips; for a tangy option, try these salt and vinegar zucchini chips. And with three cooking methods to choose from, you can pick whatever fits your kitchen setup and schedule.
- Low in carbs and perfect for keto diets
- Versatile cooking methods: oven, air fryer, or dehydrator
- Season to taste with fun and familiar flavors
- Simple prep technique ensures reliably crispy chips every time
Ingredients You’ll Need
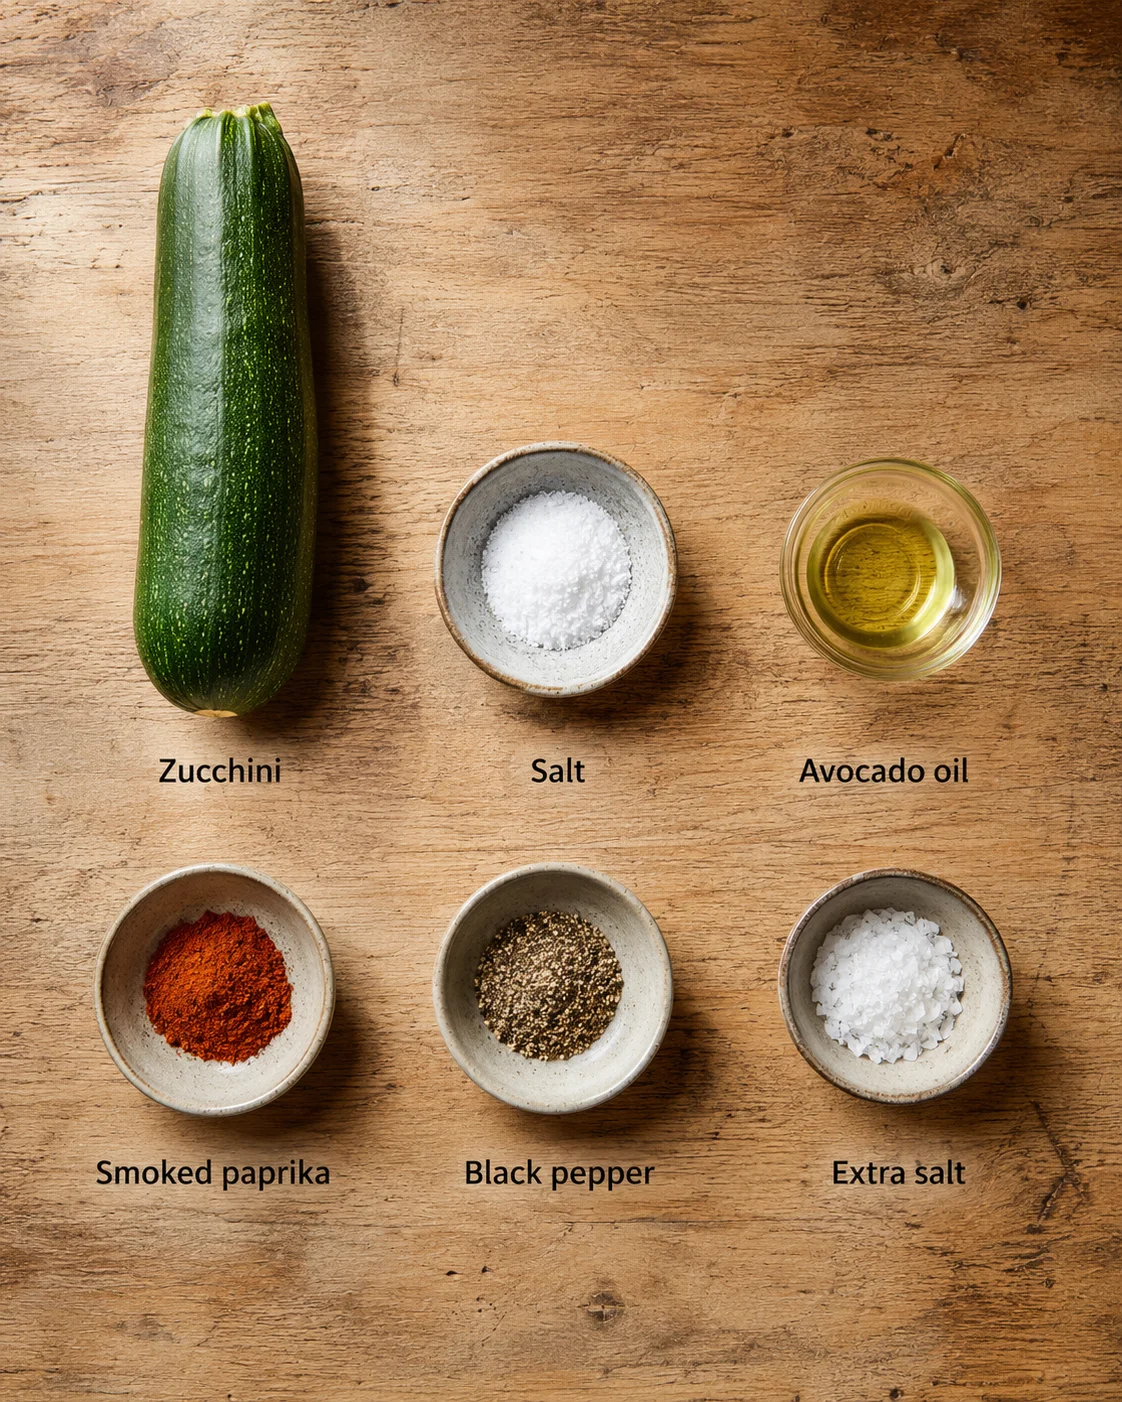
- 1 large zucchini (about 350 g)
- 1/2 tsp salt, divided
- Avocado oil spray or 1 to 2 tsp liquid oil
- 1 tsp smoked paprika
- 1/4 tsp ground black pepper
- Extra salt for seasoning, to taste
Step-by-Step Cooking Method
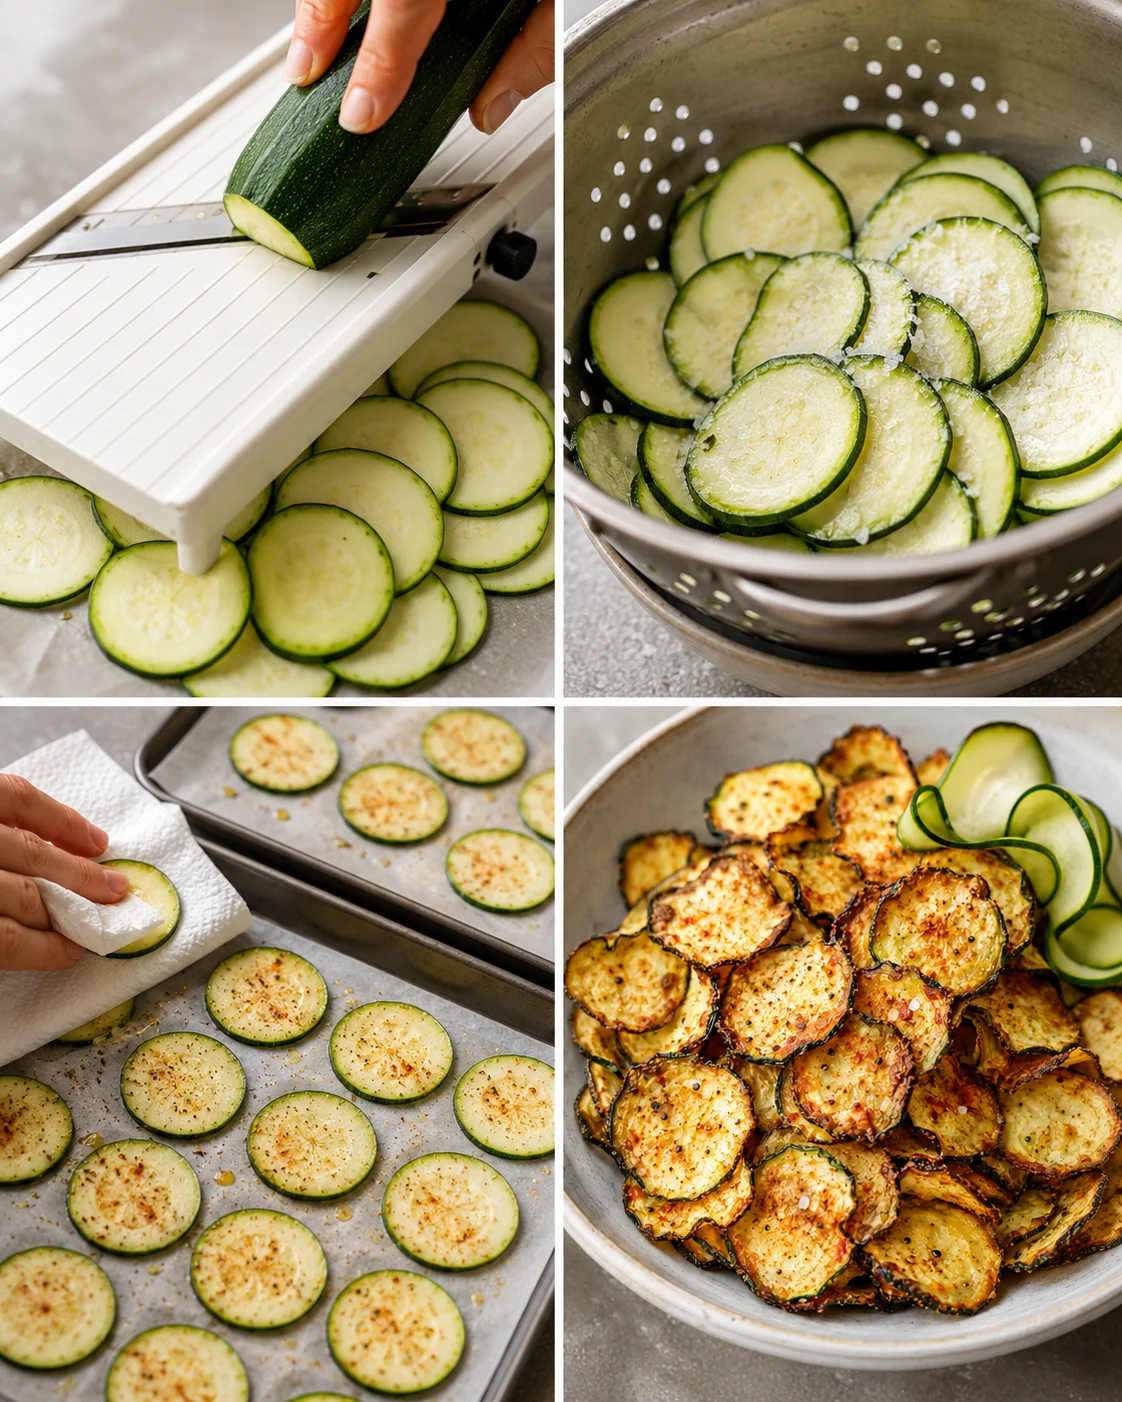
- Slice the zucchini crosswise into very thin 1/8-inch slices using a mandolin or slicing disk.
- Arrange slices in a colander, lightly sprinkle about 1/4 tsp salt over each layer and repeat until all slices are salted.
- Let the salted zucchini slices drain for 1 hour to draw out moisture.
- Lay the drained slices on a clean tea towel and pat them dry with another towel to remove remaining moisture.
- Preheat the oven to 225°F (110°C) and line baking sheets with parchment paper.
- Place slices on the parchment-lined sheets close but not touching and lightly spray or brush with avocado oil (or 1–2 tsp liquid oil).
- Mix smoked paprika, ground black pepper, and the remaining salt in a shaker and sprinkle the seasoning evenly over the slices.
- Bake at 225°F (110°C) for 70–90 minutes, rotating the pans halfway through and removing any chips that crisp early to avoid burning.
-
Remove baked chips when they are browned at the edges and snap crispy, and sprinkle extra salt to taste.
- For air fryer: after salting, draining, pat-drying, oiling, and seasoning the slices, preheat the air fryer to 350°F (175°C).
- Lay zucchini slices in a single layer in the air fryer (work in batches if needed) and air fry about 10 minutes or until crisp, checking for doneness.
- For dehydrator: after salting, draining, pat-drying, oiling, and seasoning the slices, set the dehydrator to 135°F (57°C), spread slices in a single layer on the trays, and dehydrate 8–12 hours until fully crisp, checking occasionally.
Pro Tips for Extra Crispness
- Cut evenly: A mandolin or food processor slicing disk ensures your slices are all about 1/8 inch thick. This consistency is the biggest factor in even crisping.
- Salt properly: Layer the slices with light salt in a colander and let sit for about 1 hour. This pulls out water, so the chips crisp instead of steaming.
- Dry thoroughly: Blot slices well with towels before baking—any moisture left will slow crisping.
- Choose parchment over silicone mats: Parchment paper lets the slices dry better, while silicone mats can trap moisture, making chips limp; for an oven-baked veggie chip method that maximizes crispness, see Healthy Baked Beet Chips.
- Use minimal oil: A light spray or brushing is plenty. Too much oil keeps chips greasy and soggy.
- Season lightly at first: The zucchini shrinks and concentrates flavor as it bakes, so start with a light sprinkle of seasoning.
- Don’t crowd the pan: Arrange slices close but not touching. Bake in batches if needed and rotate pans halfway to ensure even cooking.
- Watch the end of baking closely: Chips can go from perfect to burnt quickly. Remove crispiest chips early so they don’t overbrown.
- Note on cooking methods: Air frying is fast but holds fewer slices. Dehydrating takes longer but produces dry, long-lasting chips. For air-fryer timing and technique, check the step-by-step in Homemade Air Fryer Potato Chips.
Flavor Twists and Substitutions
How you season your keto zucchini chips is totally up to you!
Smoked paprika creates a nostalgic ketchup-chip vibe that many love. If you’re after a sweet-smoky profile, borrow a BBQ-style spice blend like the one used in our Homemade BBQ Chips (Barbecue Chips). Personally, I’ve always been a fan of sour cream and onion flavor myself, but there are no rules here.
Try garlic powder, onion powder, chili flakes, or even a Parmesan-and-herb combo (see the Easy Cheesy Zucchini Bake for flavor cues) for tasty twists. The key is to keep seasoning light before baking and add more if needed after they’re crisp.
How to Store and Recrisp
Let your zucchini chips cool completely before storing. Store them at room temperature in an airtight container—like a glass jar or sealed box—for up to 3 days, as mentioned in the recipe. If your chips soften over time, don’t worry! You can easily bring back the crunch:
- Oven: Spread chips on a baking sheet and warm in a 200–250°F oven for 5–10 minutes, watching closely to prevent burning.
- Air fryer: Re-crisp small batches in 2–4 minutes at 325–350°F for a quick refresh. For another fast, crispy snack, try our Quick Air Fryer Apple Chips.
For make-ahead prep, you can slice and salt the zucchini up to a day early, then pat dry and bake when you’re ready. Fully dehydrated chips, which are very dry, may last longer if stored airtight, but always check for softness or odd smells before eating.
Answers to Common Questions
- How thin should the slices be? Aim for about 1/8 inch thickness. Thinner, evenly sliced pieces crisp the best.
- How long should I bake them? At 225°F, expect around 70–90 minutes, but it depends on how thin and dry the slices are. Rotate pans halfway for even baking.
- Why salt the zucchini? Salting draws out moisture, which helps the chips dry and crisp in the oven instead of steaming — the same moisture-removal step you’ll use when making zucchini corn fritters.
- Can I use silicone baking mats? Parchment paper is preferable because silicone mats can trap moisture, which prevents proper drying and crisping.
- What are the air fryer and dehydrator times? Air fryer crisps chips at 350°F in roughly 10 minutes per single layer. Dehydrator at 135°F takes 8–12 hours to get fully crisp.
- How do I know when they’re done? Chips should look browned around the edges, feel dry to the touch, and snap or lift cleanly without bending.
- Can I use other squash? Summer squash with similar water content can work, but results vary. The salting and drying step still matters for crispness.
- How should I season them? Start with small amounts of smoked paprika, garlic powder, onion powder, or a sour cream and onion blend. Lightly season before baking and adjust after to your taste.
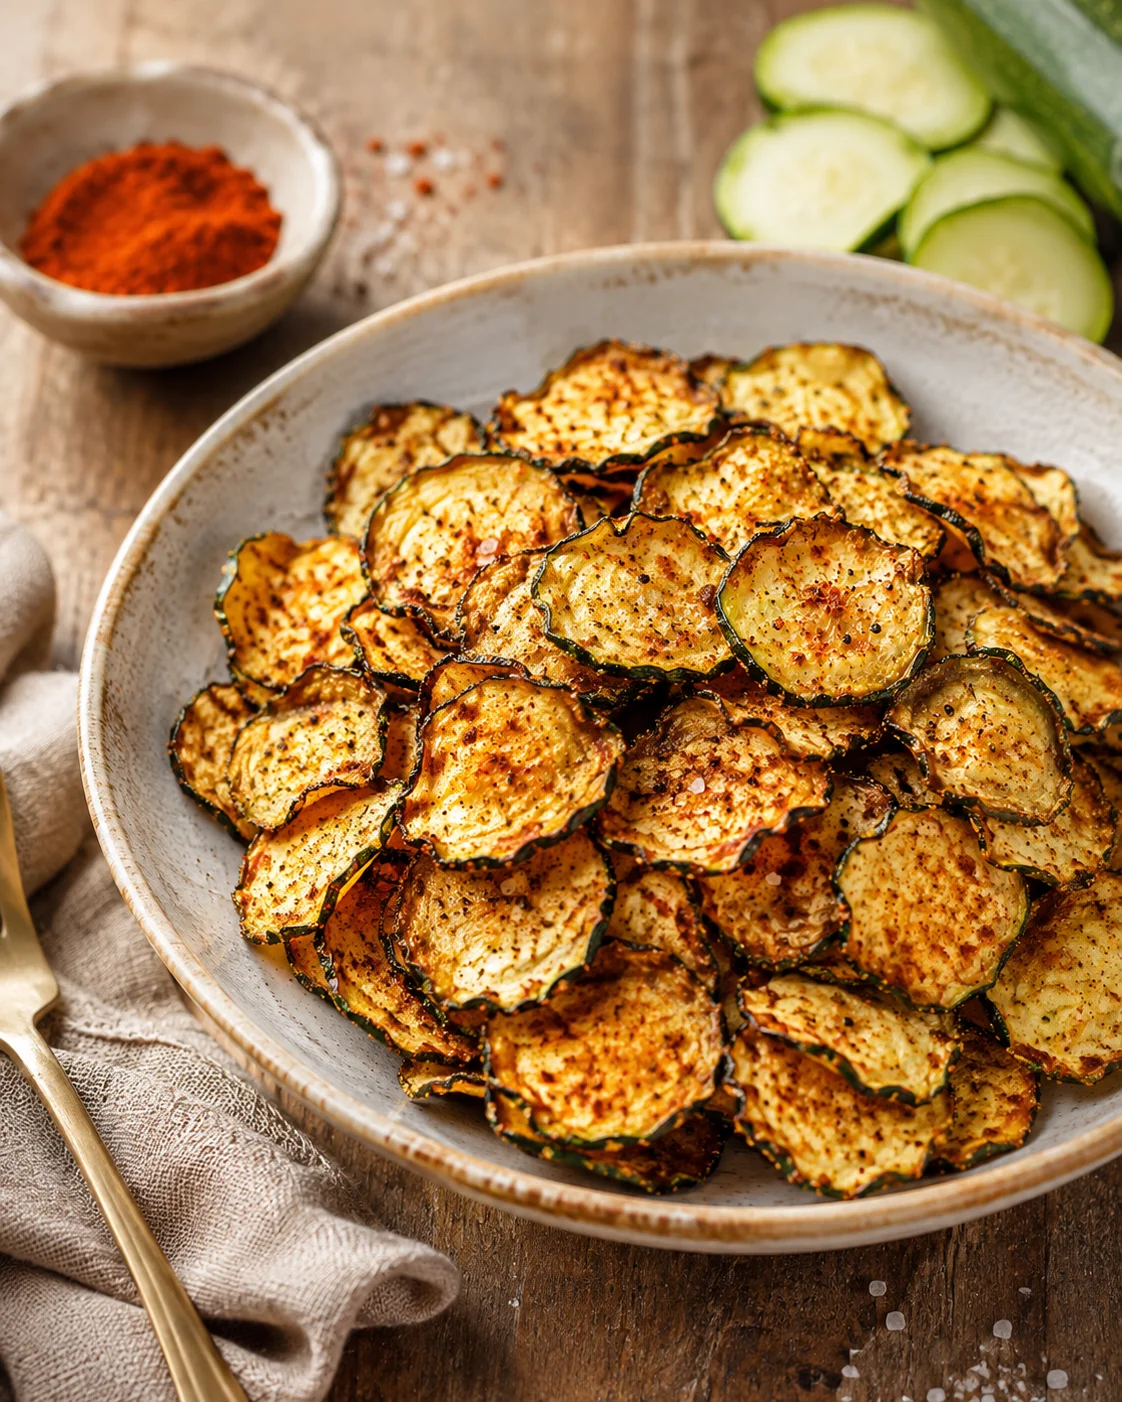
Crunchy, low-carb zucchini chips perfect for keto diets, made using oven, air fryer, or dehydrator methods with customizable seasoning.
- Prep Time: 1 hour 15 minutes
- Cook Time: 10 minutes to 12 hours depending on method
- Total Time: 1 hour 25 minutes to 13 hours depending on method
- Yield: Serves 1 large zucchini worth of chips 1x
- Category: Snack
Ingredients
- 1 large zucchini (about 350 g)
- 1/2 tsp salt, divided
- Avocado oil spray or 1 to 2 tsp liquid oil
- 1 tsp smoked paprika
- 1/4 tsp ground black pepper
- Extra salt for seasoning, to taste
Instructions
- Slice the zucchini crosswise into very thin 1/8-inch slices using a mandolin or slicing disk.
- Arrange slices in a colander, lightly sprinkle about 1/4 tsp salt over each layer and repeat until all slices are salted.
- Let the salted zucchini slices drain for 1 hour to draw out moisture.
- Lay the drained slices on a clean tea towel and pat them dry with another towel to remove remaining moisture.
- Preheat the oven to 225°F (110°C) and line baking sheets with parchment paper.
- Place slices on the parchment-lined sheets close but not touching and lightly spray or brush with avocado oil (or 1–2 tsp liquid oil).
- Mix smoked paprika, ground black pepper, and the remaining salt in a shaker and sprinkle the seasoning evenly over the slices.
- Bake at 225°F (110°C) for 70–90 minutes, rotating the pans halfway through and removing any chips that crisp early to avoid burning.
- Remove baked chips when they are browned at the edges and snap crispy, and sprinkle extra salt to taste.
- For air fryer: after salting, draining, pat-drying, oiling, and seasoning the slices, preheat the air fryer to 350°F (175°C).
- Lay zucchini slices in a single layer in the air fryer (work in batches if needed) and air fry about 10 minutes or until crisp, checking for doneness.
- For dehydrator: after salting, draining, pat-drying, oiling, and seasoning the slices, set the dehydrator to 135°F (57°C), spread slices in a single layer on the trays, and dehydrate 8–12 hours until fully crisp, checking occasionally.
Notes
Use a mandolin or slicing disk for even 1/8 inch slices to ensure uniform crisping., Light salting for 1 hour draws out moisture to prevent sogginess., Pat slices dry thoroughly to remove moisture before cooking., Use parchment paper instead of silicone mats for better drying and crispiness., Apply oil lightly; too much oil can make chips greasy., Season lightly before baking and adjust seasoning after baking if needed., Do not crowd the pan; bake in batches if necessary and rotate pans halfway through baking., Remove chips that are crispy early to prevent burning., For storage, keep chips in an airtight container at room temperature for up to 3 days., To re-crisp softened chips, warm in oven (200–250°F for 5–10 minutes) or air fryer (325–350°F for 2–4 minutes)., Summer squash with similar water content may be used but crispness results may vary.
Nutrition
- Serving Size: About 1 small handful
- Calories: Approximately 40 calories per serving (depends on oil amount)
- Fat: Approximately 3 g per serving
- Carbohydrates: Approximately 3 g net carbs per serving
- Protein: Approximately 1 g per serving