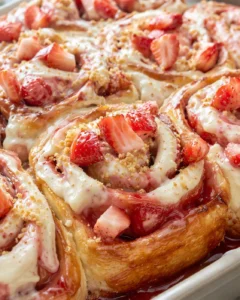
Homemade Cherry Turnovers – A Sweet, Flaky Treat for Every Season

There’s something truly special about the smell of fresh cherry turnovers baking in the oven. It instantly brings me back to my grandmother’s warm kitchen, where flaky pastries cooled on the windowsill and cherry filling bubbled away like a little pot of ruby-red magic. Her Homemade Cherry Turnovers were always a family favorite, the kind of treat that brought everyone to the table, no matter the season. Whether paired with a scoop of vanilla ice cream on a sunny summer day or warm alongside a cozy cup of tea in the winter, these turnovers never failed to put smiles on our faces.
This recipe draws on that classic American comfort baking vibe. With just a handful of simple ingredients—puff pastry, cherry filling, and an egg—you can whip up a bakery-quality dessert in less than an hour. I’m here to walk you through every step so your Homemade Cherry Turnovers come out perfectly golden and flaky every time. Let’s dive in and bring a bit of that nostalgic magic into your kitchen!
Welcome! These Homemade Cherry Turnovers are easy, comforting, and just a little bit nostalgic all rolled into one. Picture flaky, golden pastry with little pockets of bright, tangy cherry filling inside, finished with a shiny egg wash that makes them look (and taste) like you just picked them up from your favorite bakery. The recipe is super straightforward, using pantry-friendly ingredients like store-bought puff pastry, cherry pie filling, and a simple egg wash. Whether you’re a baking newbie or just want something quick and delicious, this recipe has your back.
Here’s the scoop: you’ll get about 7 turnovers with this batch (the recipe includes one extra square just in case), spend around 20 to 30 minutes putting them together, and then bake for roughly 18 to 22 minutes at 400°F. I’ll guide you step-by-step—from prepping your pastry, spooning in the cherry filling, sealing each turnover just right, brushing on that gorgeous egg wash, to adding finishing touches like a powdered sugar glaze if you want it. Plus, I’ve tucked in some handy tips on thawing and handling your dough, ideas for make-ahead and freezing, and creative flavor twists so you can customize this treat for any occasion—from quick weeknight desserts to a picnic favorite or even a gorgeous show-stopper at parties.
- Yield: Approximately 7 turnovers (one extra pastry square included for peace of mind)
- Time: About 20–30 minutes to assemble, plus 18–22 minutes baking (under an hour total if your pastry’s thawed)
- Skill Level: Perfect for beginners with a few pro tips thrown in for that extra flaky touch
Why You’ll Love These Turnovers
- Quick and Easy – Just a few ingredients, no fancy tools needed. For another speedy sweet, try Cinnamon-Sugar Pizza made with Crescent Rolls.
- Seasonally Versatile – Light and fresh for summer, warm and cozy for winter. For cozy winter inspo, see Classic Apple Crumble.
- Perfect for Any Skill Level – Friendly for newbies, satisfying for seasoned bakers.
- Family-Friendly Favorite – Kids and grown-ups love the sweet-tart filling paired with buttery, flaky pastry.

Ingredients and Optional Toppings
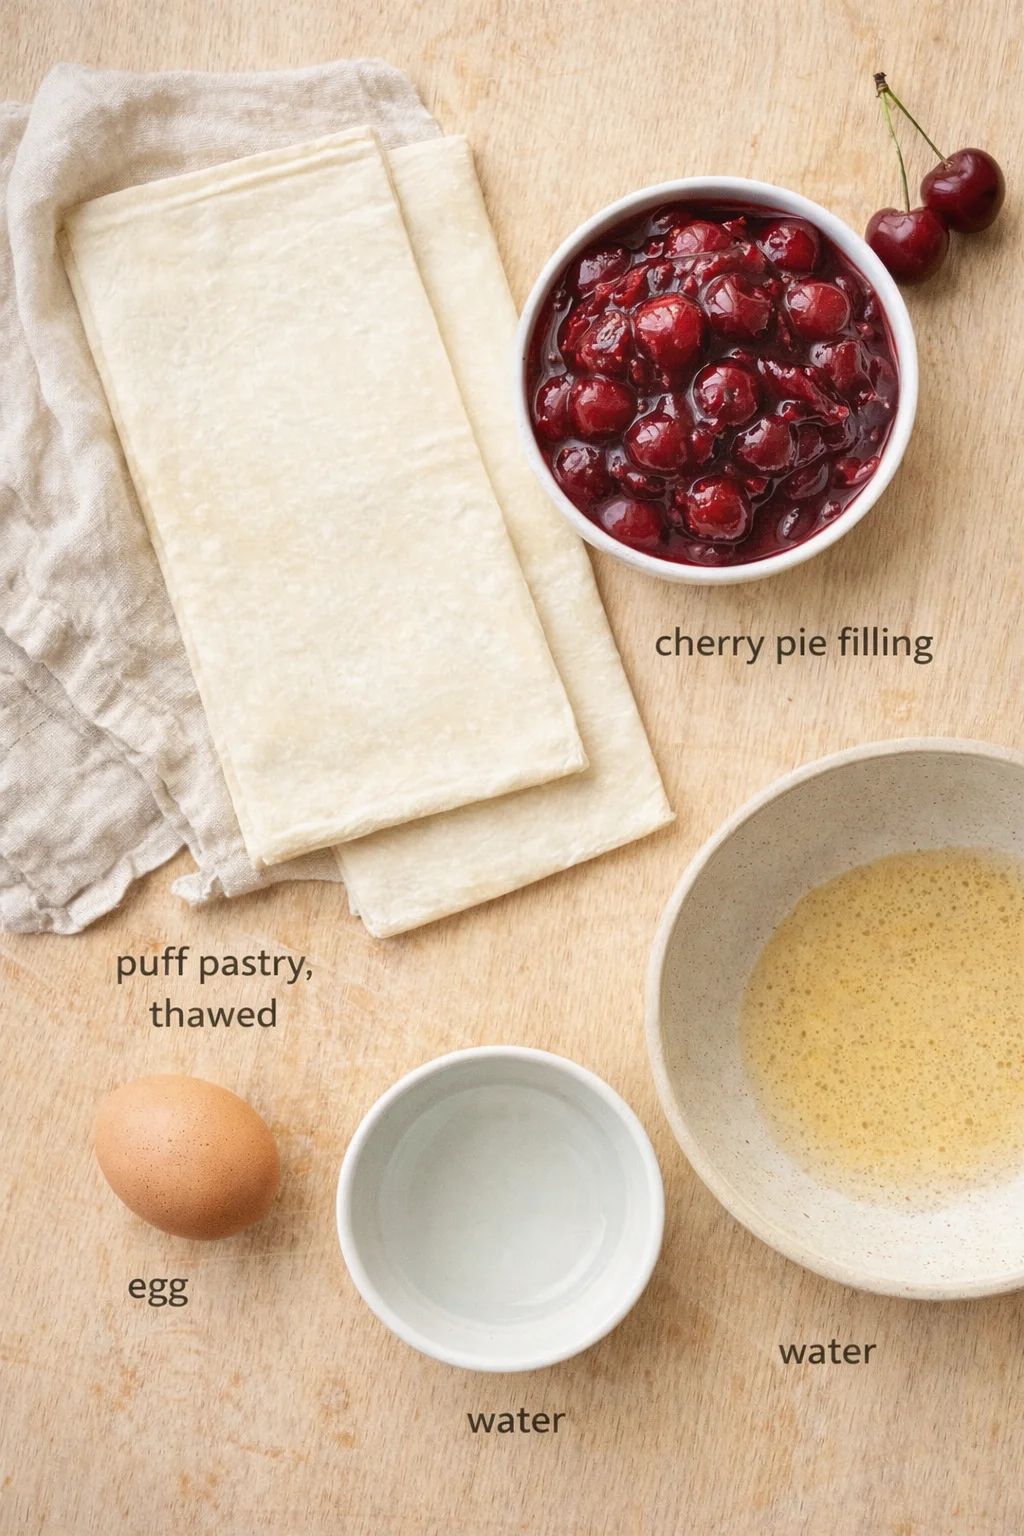
- 1 package of puff pastry (2 sheets), thawed
- 1 cup cherry pie filling (use fresh or canned—both work great!)
- 1 large egg
- 1 tablespoon water
How to Make the Turnovers
- Thaw puff pastry in the refrigerator for a few hours or on the counter for about 30 minutes until pliable.
- Keep the pastry cold and work quickly to preserve the layers.
- Preheat the oven to 400°F (200°C) and line a baking sheet with parchment paper.
-
On a lightly floured surface, gently unfold a puff pastry sheet and roll it lightly to roughly 10×10 inches.
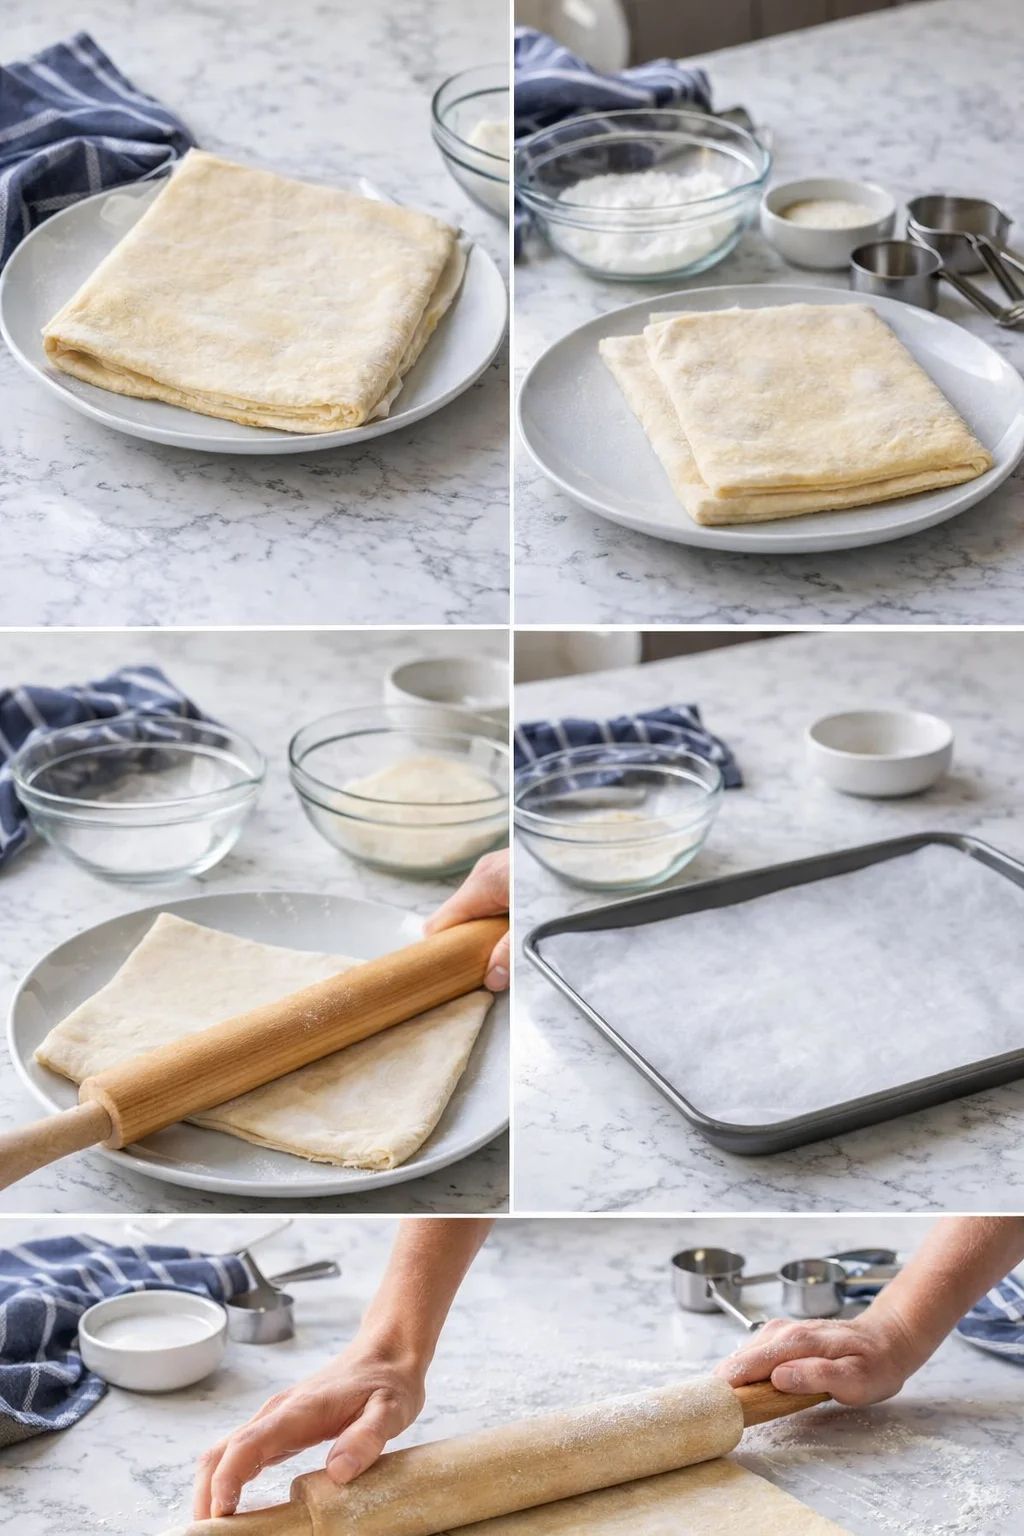
- Cut each sheet into 4 even squares.
- Place 1 to 2 tablespoons of cherry pie filling in the center of each square.
- Fold each square diagonally into a triangle and press the edges together to seal.
-
Crimp the sealed edges with a fork to secure the filling.
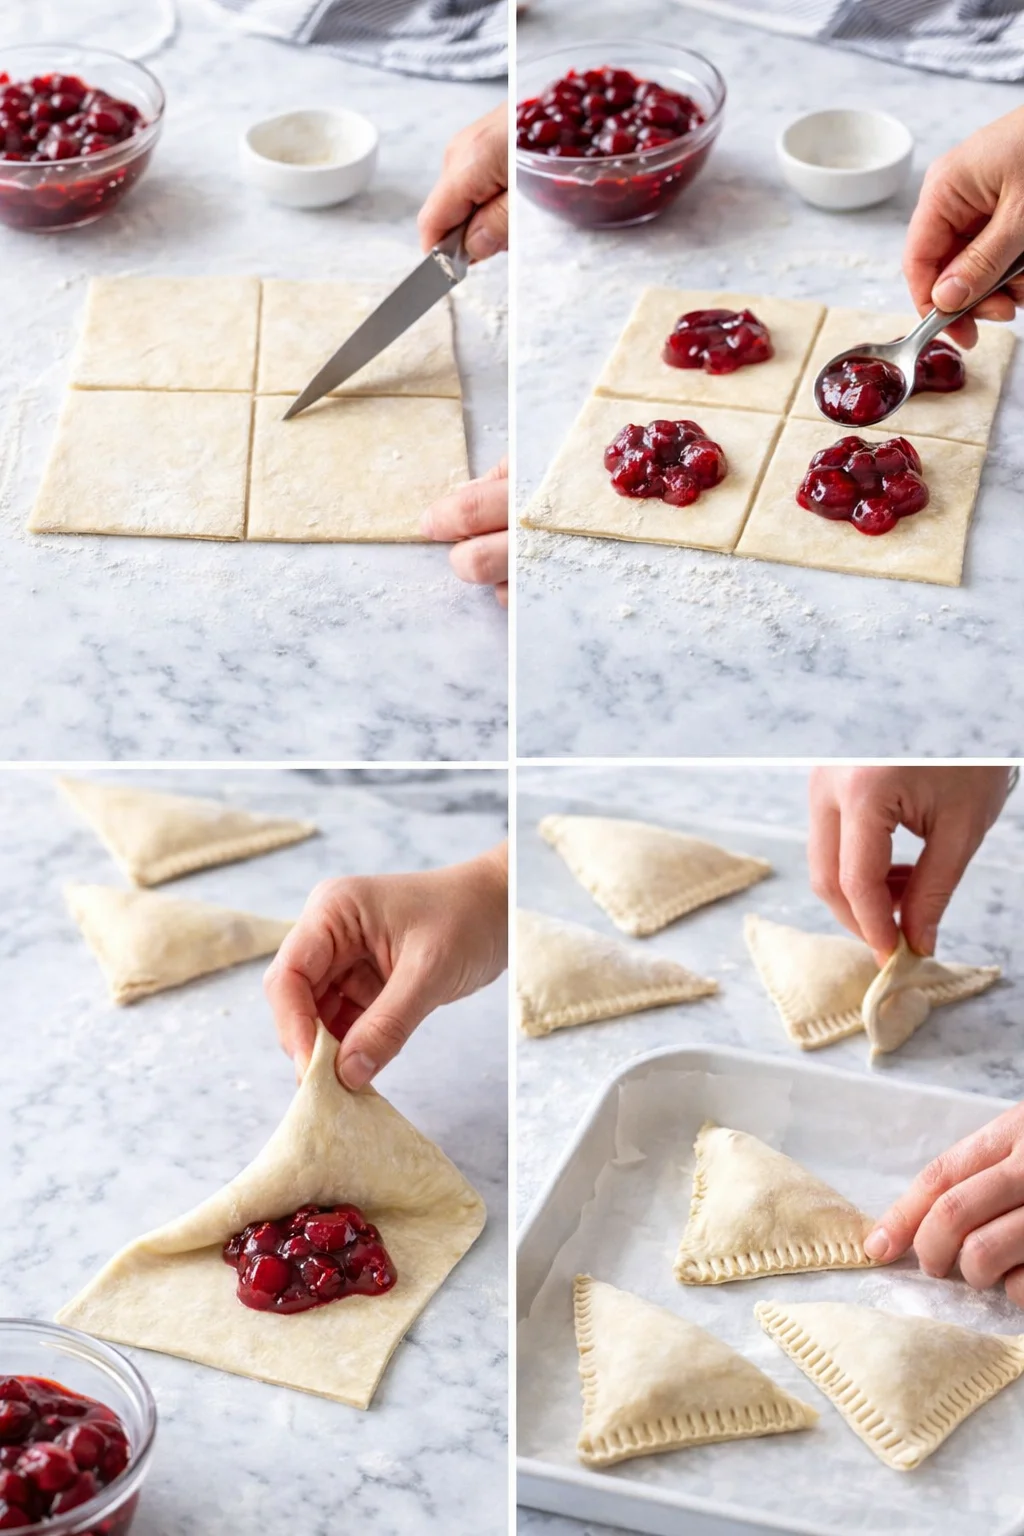
- Cut a small slit or two in the top of each turnover to vent steam.
- Arrange turnovers on the prepared baking sheet, leaving space between each.
- In a small bowl, beat 1 large egg with 1 tablespoon water to make an egg wash.
-
Brush each turnover with the egg wash.
- If desired, sprinkle granulated sugar over the turnovers before baking.
- Bake for 18–22 minutes at 400°F (200°C) until puffed and golden brown.
- Transfer turnovers to a wire rack and let cool for a few minutes.
-
If using a glaze, mix 1 cup powdered sugar with 1–2 tablespoons milk until smooth and drizzle over warm turnovers, or dust with powdered sugar.
Baking Tips for Flaky Pastry
- Thaw Puff Pastry Properly: Always thaw your puff pastry in the fridge for a few hours or on the counter for about 30 minutes. Rushing can make it sticky and hard to work with.
- Work with Cold Pastry: Once thawed, work quickly to keep the dough cold—this helps it puff up really nicely in the oven. For more flaky-crust technique, see our Rhubarb & Orange Frangipane Galette.
- Seal Those Edges: Press and crimp the edges well to keep that cherry filling safely tucked inside.
- Vent the Pastry: Cut a tiny slit or two on top of each turnover so steam can escape while baking—this stops the pastry from getting soggy or bursting.
Flavor Twists and Substitutions
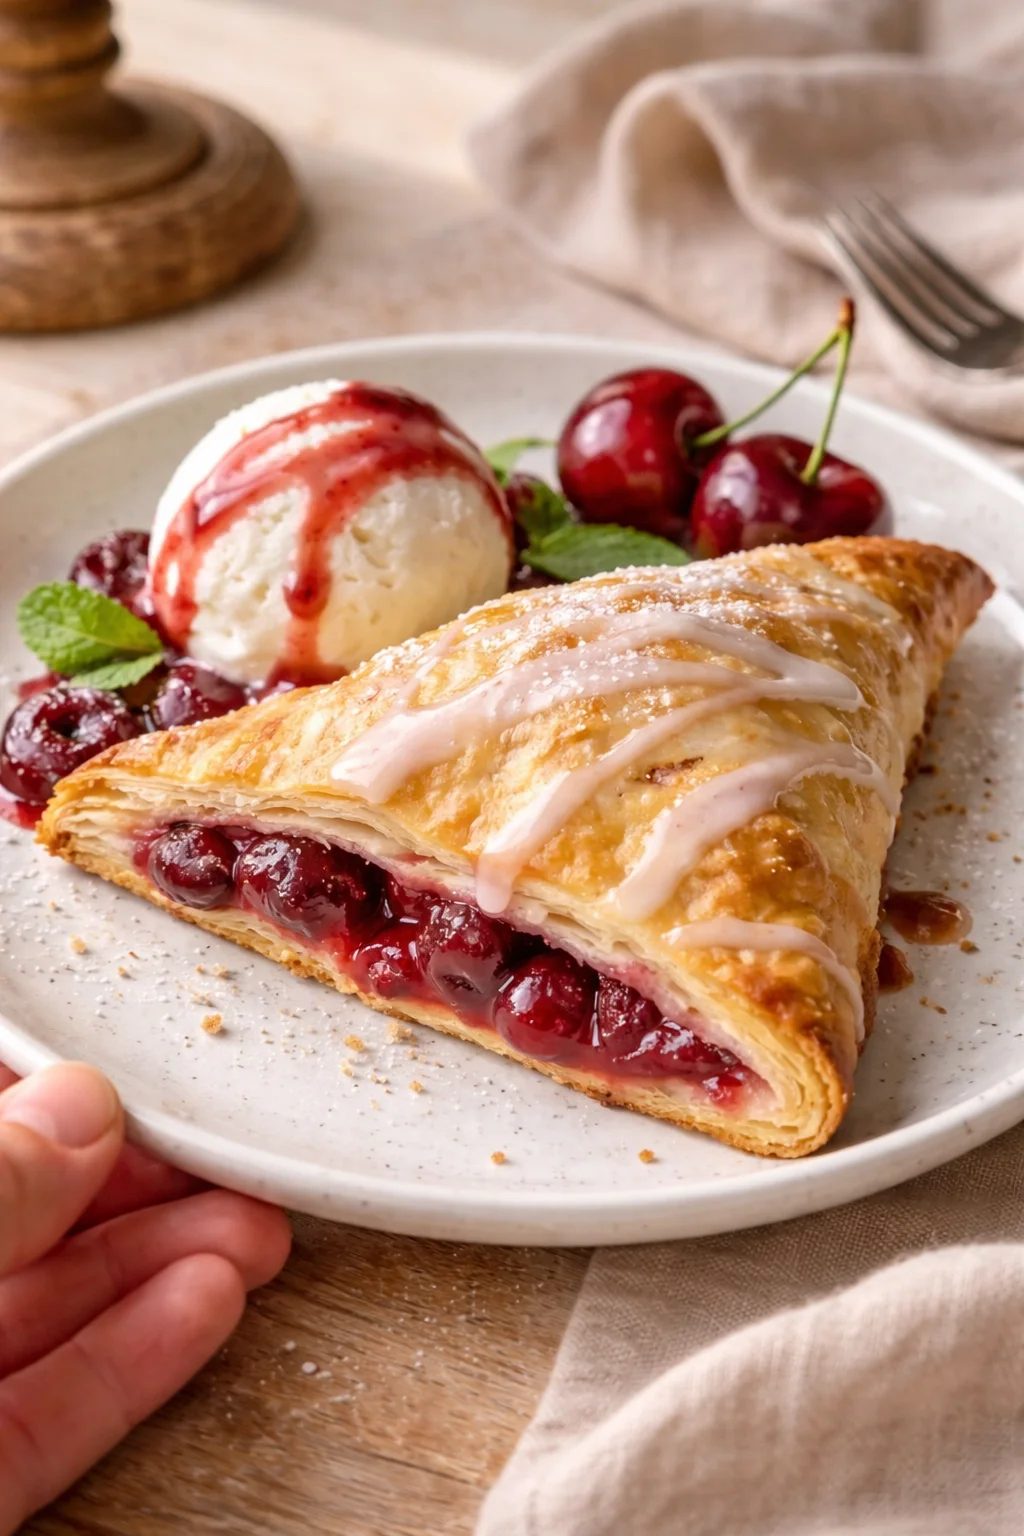
If you want a little extra sweetness, mix 1 cup powdered sugar with 1 to 2 tablespoons milk until smooth, then drizzle it over cooled turnovers for a simple glaze that’s just dreamy.
- Cheese & Cherry: Add a spoonful of sweetened cream cheese (a quick cream cheese frosting works in a pinch) inside with the cherry filling for a creamy surprise.
- Almond Twist: Stir a few drops of almond extract into your cherry filling to add a lovely nutty flavor.
- Mixed Berry: Swap out the cherry for a mix of blueberries and cherries, or use canned peaches for a summery variation.
- Savory Option: Skip the sugar entirely and try a savory version filled with cheese and ham.
- Low-Sugar Cherry Filling: Use a homemade cherry compote with less sugar for a lighter dessert.
- Whole Wheat Puff Pastry: Look for whole-grain puff pastry in stores if you want more fiber and nutrients.
- Gluten-Free Version: Pick up gluten-free puff pastry from a specialty store to keep these turnovers safe for gluten-sensitive friends.
Storing, Freezing, and Reheating
- Refrigerator: Keep turnovers fresh in an airtight container for up to 3 days.
- Freezer: Freeze unbaked turnovers on a baking sheet. Once fully frozen, transfer them to a zip-top bag and freeze for up to a month.
- Reheating: Warm turnovers in a 350°F oven for 5–10 minutes to get that flaky texture back. Avoid microwaving, which makes pastry soggy.
Common Questions About Turnovers
Can I make cherry turnovers ahead of time?
Definitely! Assemble your turnovers and freeze them before baking. When you’re ready to bake, pop them straight into the oven from frozen. Just add about 5 extra minutes to the baking time to get them perfectly golden.
Can I use other fruits?
Absolutely! Apples (for flavor inspiration, see our Apple Bars recipe), peaches, or even a fun combo like Nutella with banana all work wonderfully in these turnovers.
Why is my puff pastry not rising?
That usually happens when the dough gets too warm. Always keep your puff pastry chilled until you’re ready to bake—that cold dough is what makes it puff up beautifully.


More in Breakfast
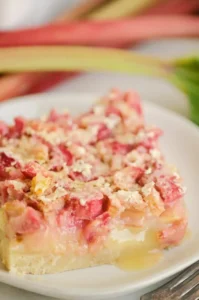
Rhubarb Dream Bars

Green Onion Zucchini Cheddar Quick Bread

Sweet Cinnamon Sugar Bread