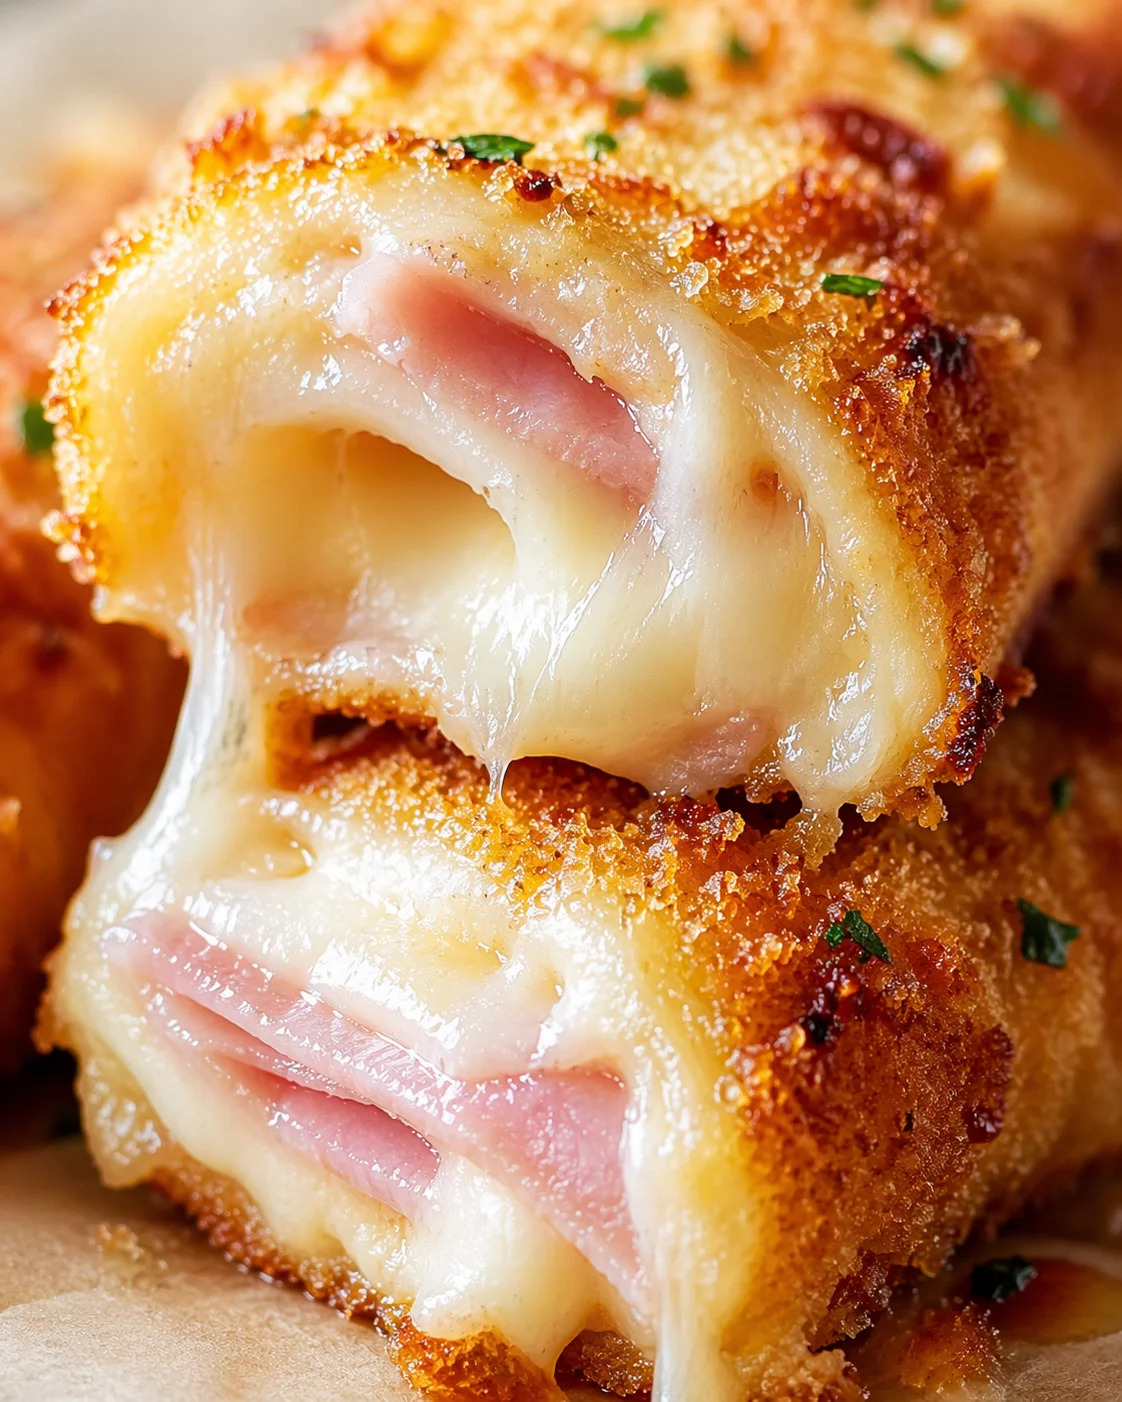
Ham and Cheese Sticks – Dishes Tasty | Easy & Delicious Recipes
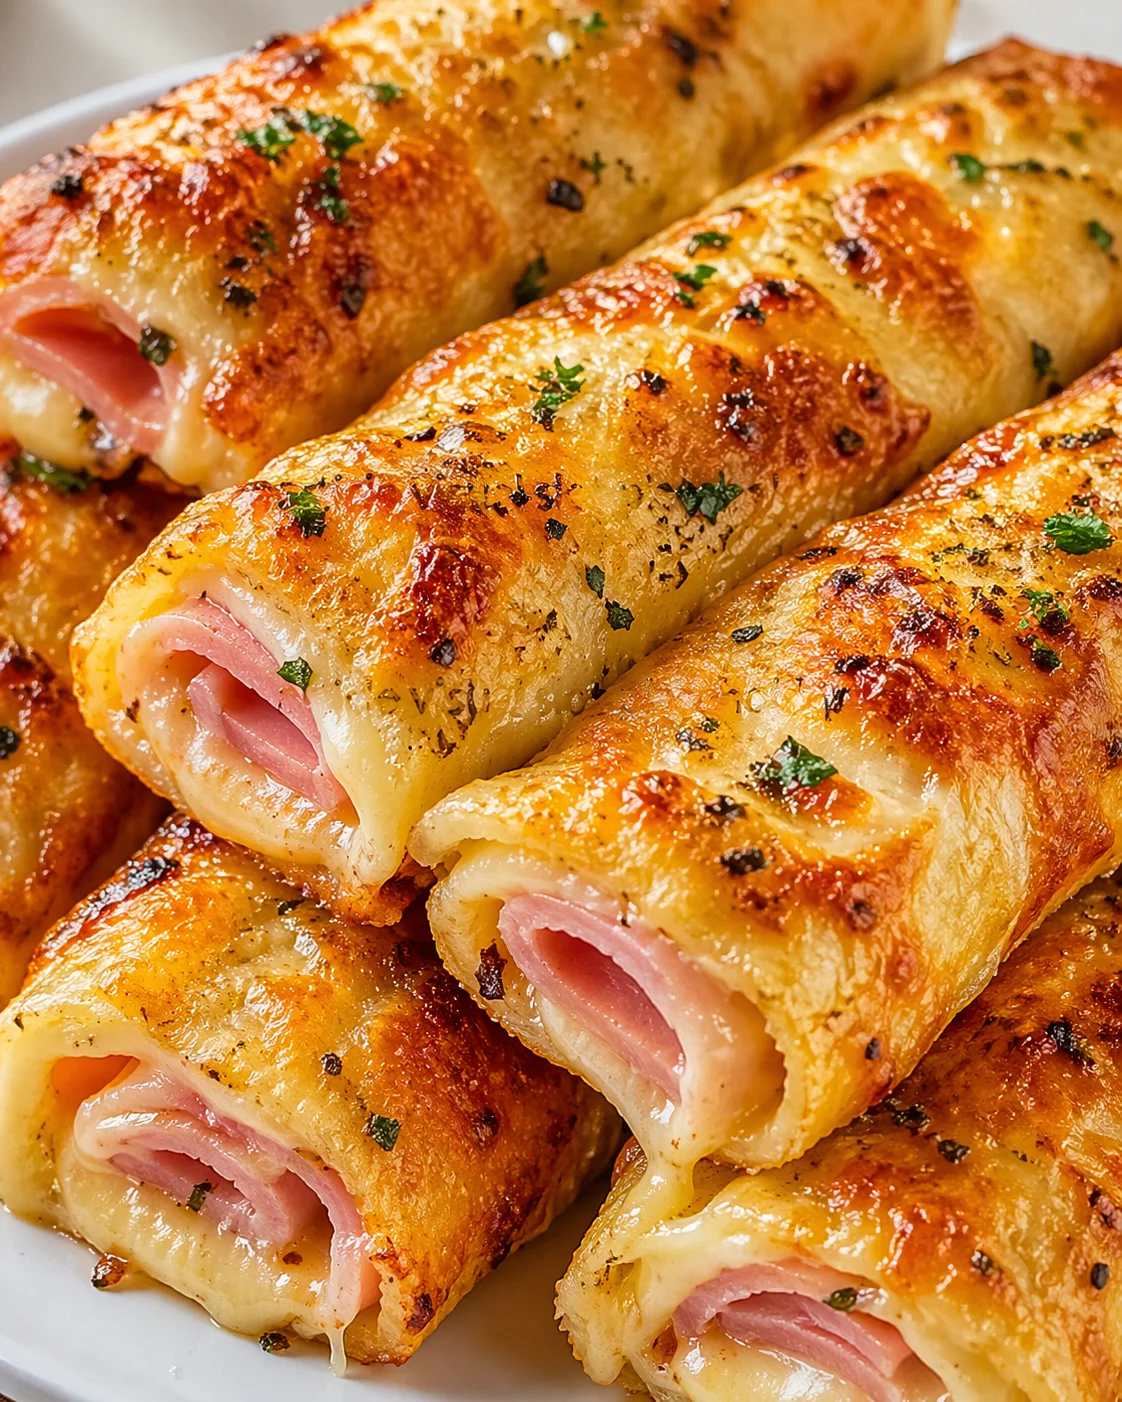
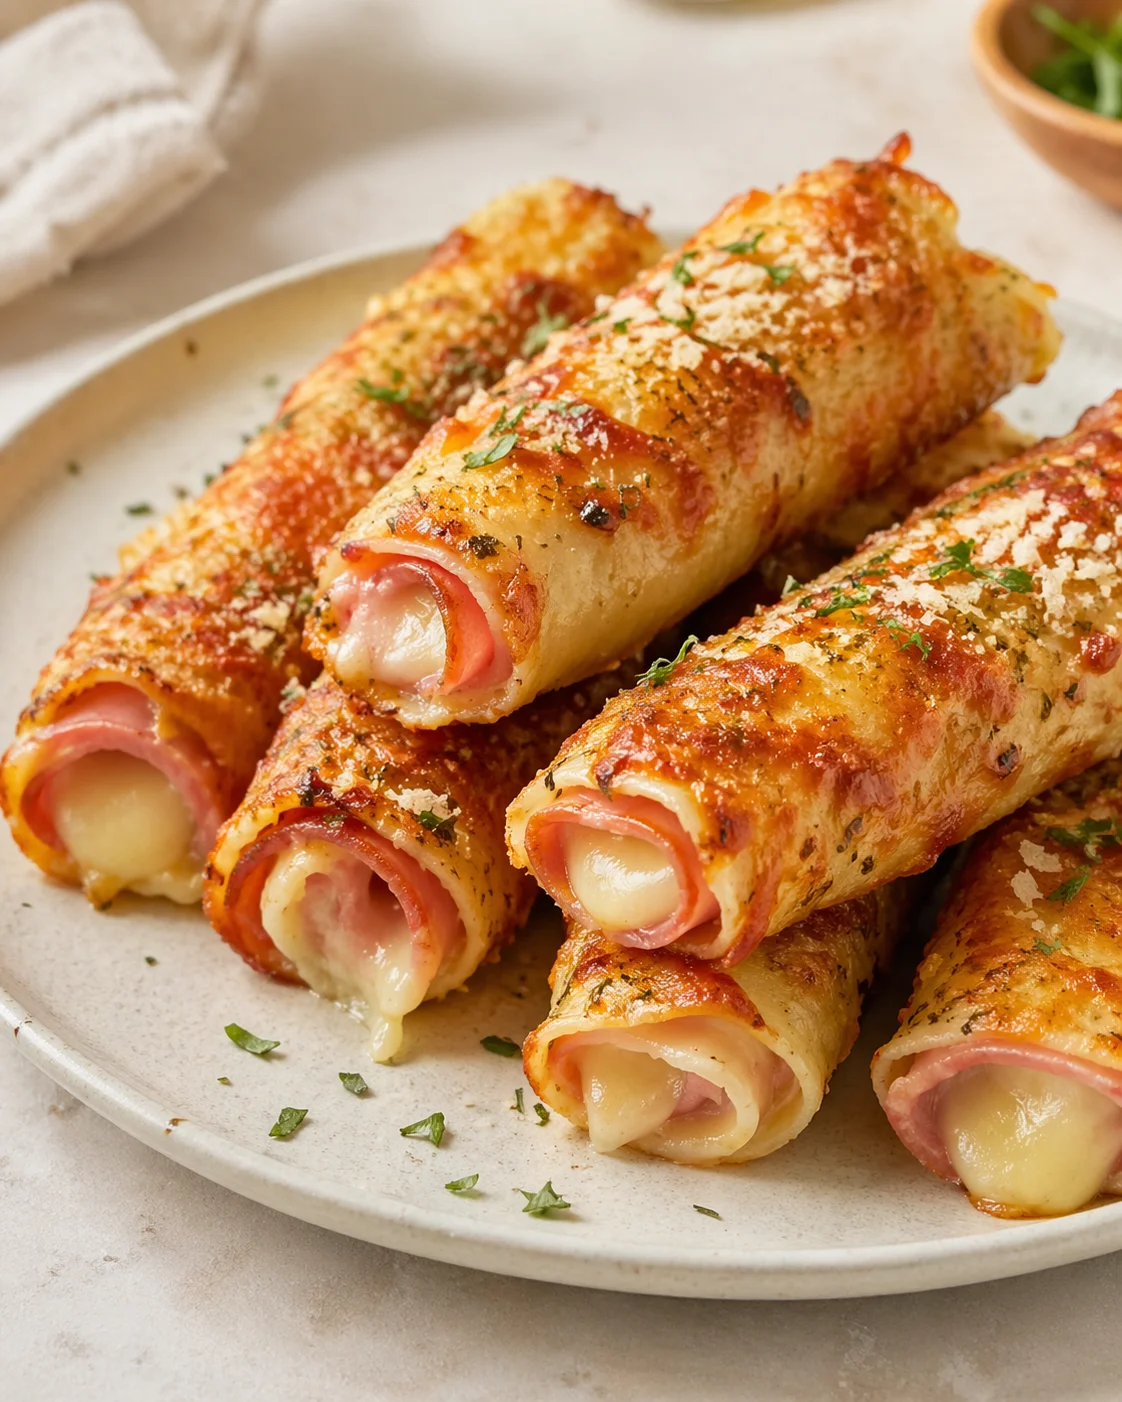
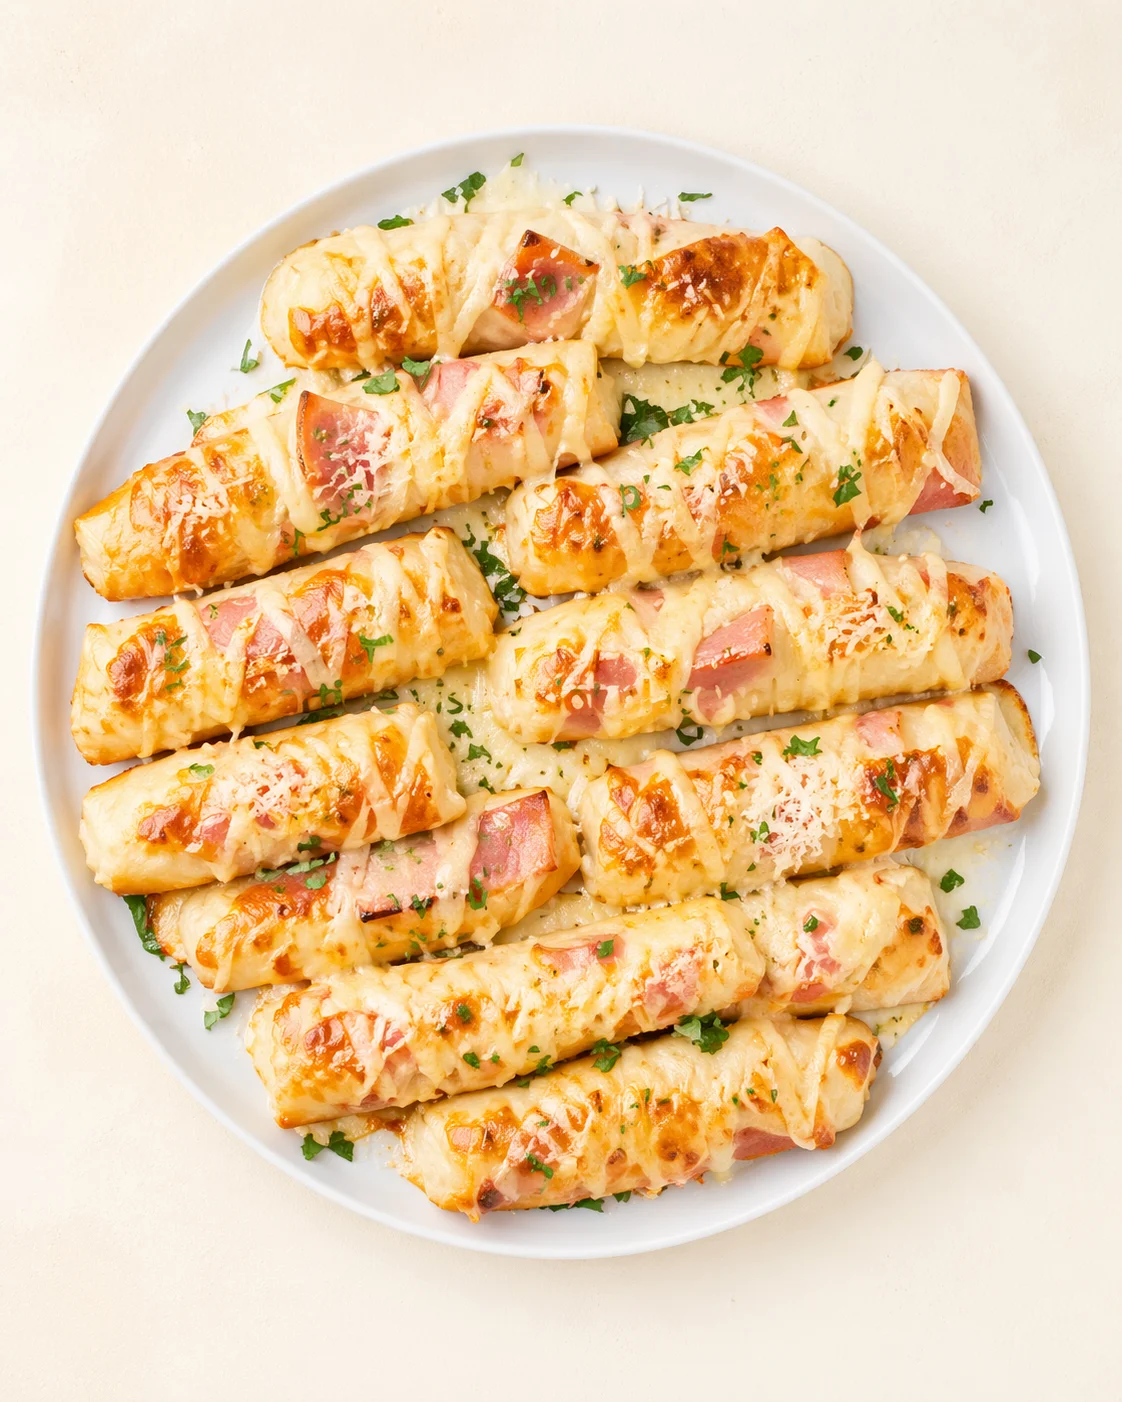
I get it—finding a quick snack that everyone at home actually loves isn’t always easy, especially when you’re a busy mom juggling a million things. Enter Ham and Cheese Sticks! With just a handful of everyday ingredients and very little fuss, you can whip these up in no time. Imagine pulling a tray of warm, cheesy sticks fresh from the oven and watching your family’s faces light up with that delicious, comforting aroma. These snacks are a perfect fix for snack attacks, last-minute visits, or any time you want to show up with something tasty without the stress!
Making Ham and Cheese Sticks isn’t just about the food—it’s about that cozy feeling you get when sharing something homemade with the people you care about. Pulling those crispy, golden sticks out of the oven feels like a mini celebration. This recipe is straightforward enough for the busiest days but impressive enough to bring out at get-togethers. Each bite is a dreamy mix of savory ham and gooey cheese wrapped in flaky pastry. So, pull up a chair, gather the crew, and let these tasty sticks be your go-to snack that everyone will ask for again and again!
Why Everyone Will Devour Them
These Ham and Cheese Sticks are irresistible because they turn just a few ingredients into a seriously tasty snack in no time at all. From kids to picky eaters, and even the pickiest adults, these sticks please almost everyone around the table. They’re a total lifesaver on those super busy days since they take less than 30 minutes to make from start to finish. Plus, how can anyone say no to that dreamy combo of salty ham and melting cheese all wrapped in a flaky crust? Seriously, it’s like comfort food magic.
Gather These Simple Ingredients
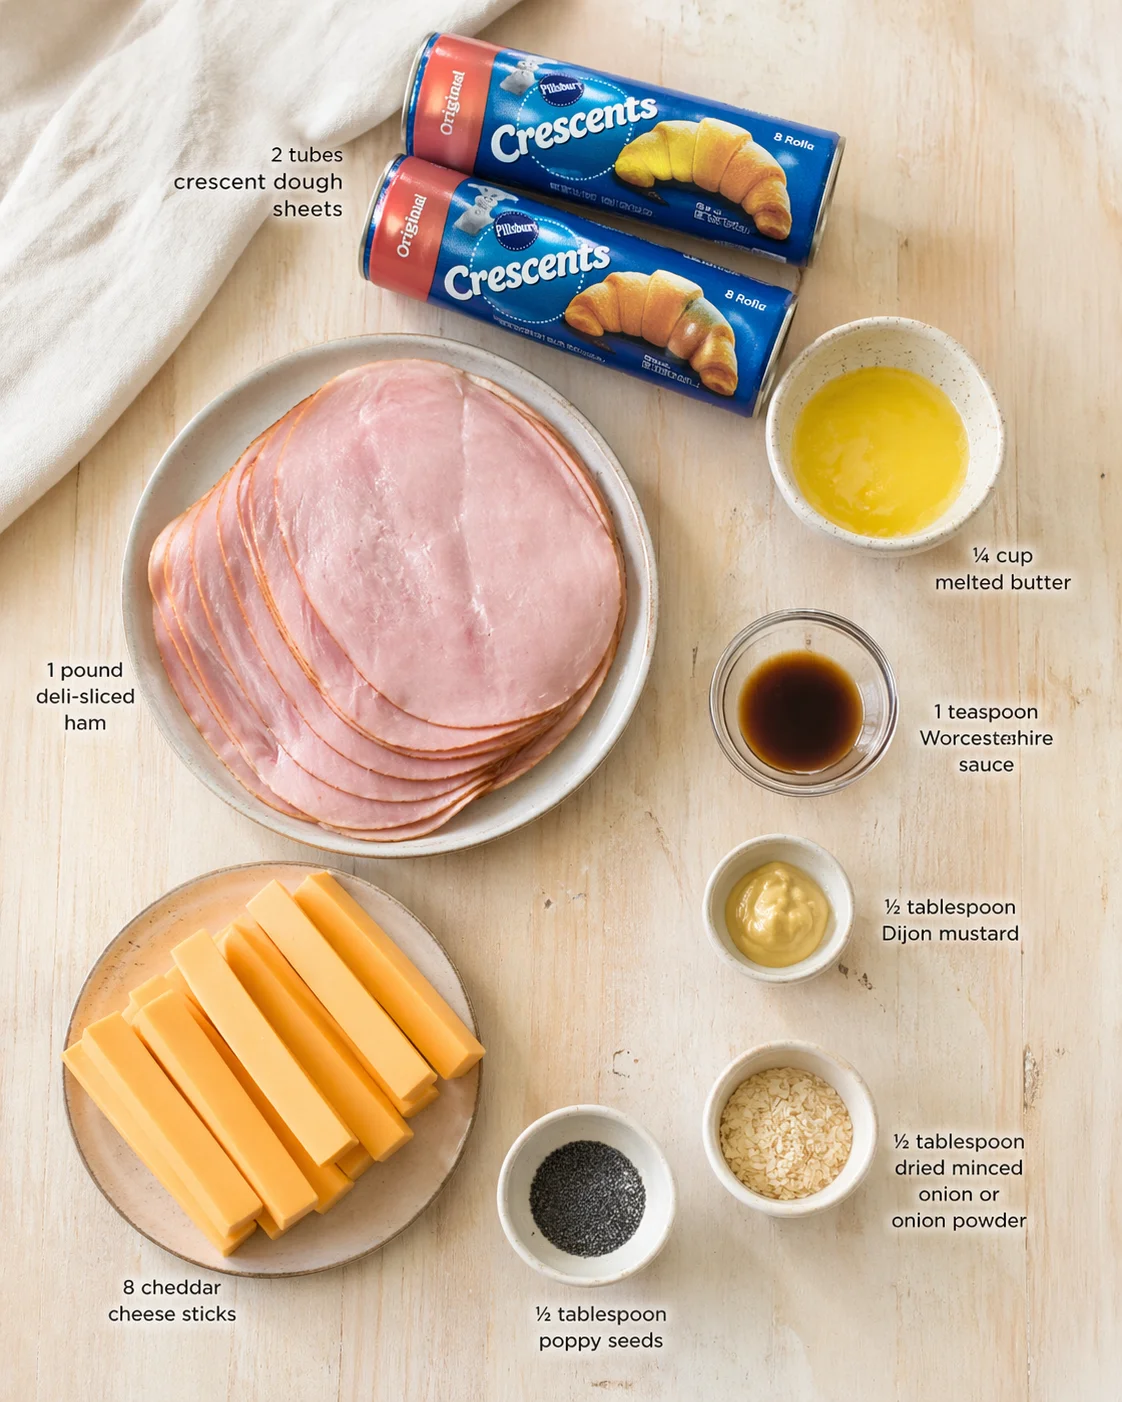
- 2 tubes crescent dough sheets
- 1 pound deli-sliced ham
- 8 cheddar cheese sticks
- ¼ cup melted butter
- 1 teaspoon Worcestershire sauce
- ½ tablespoon Dijon mustard
- ½ tablespoon dried minced onion or onion powder
- ½ tablespoon poppy seeds
Assemble, Bake, and Serve
- Preheat oven to 350°F (175°C) and grease or line a baking sheet with parchment.
- Unroll crescent dough sheets and cut each sheet into 4 equal rectangles (8 pieces total).
- Lay a slice of deli ham on each dough rectangle.
-
Place a cheddar cheese stick on top of the ham on each piece.
- Fold the dough ends over the filling and roll each piece to seal.
- Arrange the prepared sticks on the baking sheet, leaving space between them.
- Whisk together melted butter, Worcestershire sauce, Dijon mustard, dried minced onion (or onion powder), and poppy seeds in a small bowl.
-
Brush the butter mixture evenly over each stick.
- Bake for 12–15 minutes until golden brown.
-
Let the sticks rest 1–2 minutes before serving.
Tips for Best Texture and Flavor
- Use a pizza cutter or sharp knife to slice the dough cleanly—it really makes the prep easier and neater.
- Not a cheddar fan? Try mozzarella for a milder flavor or pepper jack if you like a little heat.
- Want extra crunch? Add some breadcrumbs to your butter mixture before brushing on the sticks.
- Always serve them warm for that ooey-gooey cheese goodness.
- Got leftovers? These freeze beautifully, just reheat in the oven for a quick, tasty snack later on.
- Serve your Ham and Cheese Sticks alongside a dipping sauce like spicy mustard or creamy ranch to amp up the flavor.
- Pair them with a crisp green salad to balance the richness and keep things fresh on the plate.
- For drinks, a cold lemonade or sparkling water refreshes the palate perfectly.
- Planning a get-together? Garnish your serving platter with fresh parsley to add a pop of color and a fresh touch.
Flavor Swaps and Add-Ins
- Spinach and Feta: Swap out the ham for fresh spinach leaves and sprinkle in some crumbled feta cheese for a Mediterranean flair that’s fresh and tasty.
- Turkey and Swiss: Use sliced turkey breast and Swiss cheese for a lighter, yet still flavorful twist that your family will love.
- Spicy Jalapeño: Add thin sliced jalapeños to the filling if you want to bring some heat to the party.
- Veggie Delight: Roast your favorite veggies and toss them with mozzarella for a vegetarian-friendly version everyone can enjoy.
- Herb Infusion: Mix fresh herbs such as basil, thyme, or rosemary into the butter glaze for an extra fragrant and tasty upgrade.
How to Store and Reheat
Once your Ham and Cheese Sticks cool down a bit, store them properly to keep them fresh and tasty:
- Refrigerator: Store cooled sticks in an airtight container or resealable bag and pop them in the fridge within 2 hours of baking. They’ll stay good for up to 3 days. When you want to eat, reheat in a 350°F (175°C) oven for about 8–10 minutes or until warm throughout.
- Freezing: These freeze wonderfully! Wrap each stick tightly in plastic wrap or parchment, then place them in a freezer-safe bag or container. Baked sticks keep best for about 2 months. You can also freeze them unbaked—just freeze assembled sticks on a tray until firm, then transfer to a bag and keep for up to 1 month.
- Reheating from frozen: Put frozen sticks straight into a 350°F oven and bake for 17–23 minutes until golden and hot. Air frying at 325°F for 4–6 minutes works beautifully too. Microwaving is quick but can soften the dough, so if you microwave, crisp them up briefly in the oven or air fryer afterward for the best texture.
- Make-ahead tips: You can assemble these sticks up to 24 hours in advance. Keep them covered in the fridge if baking the next day, or freeze as described above. If baking from frozen, just add a few extra minutes to cook time.
- Food safety: Remember, don’t leave these sticks out at room temperature for more than 2 hours. Toss any leftovers after 3 days for safety.
Answers to Common Questions
Can I make Ham and Cheese Sticks ahead of time?
Definitely! You can prep and even freeze them ahead. When you’re ready, bake them straight from frozen and add a few extra minutes. These make fantastic last-minute snacks!
What dipping sauces go well with Ham and Cheese Sticks?
They’re pretty versatile. Mustard, ranch, or even a sweet chili sauce all pair beautifully. Play around and find your family’s favorite combo!
Can I swap the cheese for another type?
Of course! Cheddar is classic, but mozzarella, pepper jack, or gouda all work great. Feel free to mix it up and customize to your liking.
How should I store leftovers?
Keep any leftovers in an airtight container in the fridge for up to 3 days. Reheat in the oven to keep them tasting fresh and crispy!
Are these Ham and Cheese Sticks kid-friendly?
Absolutely! Kids love the cheesy, savory combo, and the sticks are easy to hold and fun to eat, making them a hit with little ones and grown-ups alike.
Easy, quick-to-make savory snack of deli ham and cheddar cheese wrapped in crescent dough, brushed with a flavorful butter glaze and baked until golden and flaky.
- Prep Time: 10 minutes
- Cook Time: 12-15 minutes
- Total Time: 22-25 minutes
- Yield: 8 sticks 1x
- Category: Snack
Ingredients
- 2 tubes crescent dough sheets
- 1 pound deli-sliced ham
- 8 cheddar cheese sticks
- 1/4 cup melted butter
- 1 teaspoon Worcestershire sauce
- 1/2 tablespoon Dijon mustard
- 1/2 tablespoon dried minced onion or onion powder
- 1/2 tablespoon poppy seeds
Instructions
- Preheat oven to 350°F (175°C) and grease or line a baking sheet with parchment paper.
- Unroll crescent dough sheets and cut each sheet into 4 equal rectangles, yielding 8 pieces in total.
- Lay one slice of deli ham on each dough rectangle.
- Place one cheddar cheese stick on top of the ham on each piece.
- Fold the dough ends over the filling and roll each piece tightly to seal.
- Arrange the prepared sticks on the baking sheet, spacing them apart.
- In a small bowl, whisk together melted butter, Worcestershire sauce, Dijon mustard, dried minced onion (or onion powder), and poppy seeds.
- Brush the butter mixture evenly over each stick.
- Bake the sticks for 12 to 15 minutes until golden brown and flaky.
- Let the sticks rest for 1 to 2 minutes before serving.
Notes
Use a pizza cutter or sharp knife to slice the dough cleanly for easier prep., Cheddar cheese can be swapped with mozzarella for a milder flavor or pepper jack for some heat., Add breadcrumbs to the butter mixture for extra crunch if desired., Serve the sticks warm for optimal cheesy gooeyness., They freeze well: baked sticks keep up to 2 months frozen; unbaked assembled sticks freeze up to 1 month., Reheat refrigerated leftovers in an oven at 350°F for 8-10 minutes or until warmed through., Reheat frozen sticks in oven at 350°F for 17-23 minutes or air fry at 325°F for 4-6 minutes., Avoid leaving sticks at room temperature for more than 2 hours; discard leftovers after 3 days for food safety., Serve with dipping sauces like spicy mustard, ranch, or sweet chili sauce; pair with a crisp green salad and cold beverages like lemonade or sparkling water.
Nutrition
- Serving Size: 1 stick
- Calories: Approx. 250 calories per serving (1 stick)
- Fat: Approx. 15 grams per serving
- Carbohydrates: Approx. 20 grams per serving
- Protein: Approx. 12 grams per serving